December 12, 2025
.webp)
Types of Cinematic Shots: Master the Frame in 5 Techniques
Explore types of cinematic shots and learn how to master the frame with 5 essential techniques to elevate your filmmaking.
Career Development
minutes
Types of Cinematic Shots: Master the Frame in 5 Techniques
Every great film, from a blockbuster epic to a local indie gem, speaks a visual language built from fundamental building blocks: cinematic shots. Understanding the different types of cinematic shots is the first step towards transforming a simple recording into a compelling narrative. It's the craft of knowing when to pull back to reveal the scale of a West Coast landscape versus when to push in to capture the subtle emotion on a character's face.
This guide isn't about rigid rules or formal training; it's a practical toolkit designed for aspiring creators, business owners, and hobbyists across New Zealand. We'll explore ten essential shot types, breaking down not just what they are, but why and how you should use them to tell your story with greater intention and impact. Before you even think about framing a shot, understanding how to storyboarding a video is crucial for visualising your narrative from start to finish. Proper planning ensures every frame serves a purpose.
Whether you're shooting a promotional video for your Wellington-based business, documenting life on a Canterbury farm, or creating a short film on the streets of Dunedin, mastering these techniques will give your work a professional, polished edge. By the end of this article, you will have a clear, actionable framework for choosing the right shot to convey specific moods, reveal critical information, and guide your audience's emotional journey. Let's dive into the essential camera shots that form the foundation of powerful visual storytelling.
1. Close-Up (CU)
Among the most powerful and fundamental types of cinematic shots, the close-up (CU) is designed to create intimacy and focus attention. This shot tightly frames a person or an object, filling the screen to highlight specific details that might otherwise go unnoticed. Its primary function is to magnify emotion, making it a crucial tool for conveying a character’s internal state, from subtle flickers of doubt to overwhelming joy.
Pioneered by early filmmakers like Carl Theodor Dreyer and Sergei Eisenstein, the close-up pulls the audience directly into the character’s personal space. Think of Michael Corleone’s chillingly calm expression in The Godfather as he solidifies his power, or the intense, revealing facial shots in Parasite that betray characters' true motives. These moments rely on the close-up to deliver maximum emotional impact.
When and Why to Use a Close-Up
Use a close-up shot when you need to connect the audience emotionally with a character or emphasise a critical story element. It's most effective during pivotal scenes, such as a character's critical decision, a moment of realisation, or a dramatic confrontation. By eliminating background distractions, the CU forces the viewer to confront the subject head-on, making it an indispensable tool for storytelling.
Actionable Tips for Filming Close-Ups
- Master Your Focus: For a character shot, ensure the focus is razor-sharp on the eyes. The eyes are the window to the soul, and sharp focus here creates a powerful connection.
- Utilise Shallow Depth of Field: Use a wider aperture (e.g., f/1.8 to f/2.8) to blur the background. This technique, known as bokeh, isolates your subject, making them pop from the screen.
- Shape with Light: Position your key light to create soft shadows that define facial contours. This adds depth and dimension, preventing the face from looking flat.
- Mind Your Framing: Leave appropriate headroom and look-room (or "nose room"). If the character is looking to the left, frame them on the right side of the screen to give their gaze space.
NZ Scenario & Practice Exercise
Scenario: You're filming a short documentary about a Marlborough winemaker tasting a new vintage for the first time. A close-up on their face as they swirl the glass and take the first sip will capture every nuanced reaction: the initial assessment, the moment of satisfaction, or the hint of disappointment.
Practice: Grab your camera and a friend. Ask them to silently react to three different pieces of news: winning a lottery ticket, receiving a parking fine, and remembering a forgotten anniversary. Film each reaction in a close-up, focusing entirely on their eyes and facial expressions. Review the footage to see how effectively you captured the subtle emotional shifts.
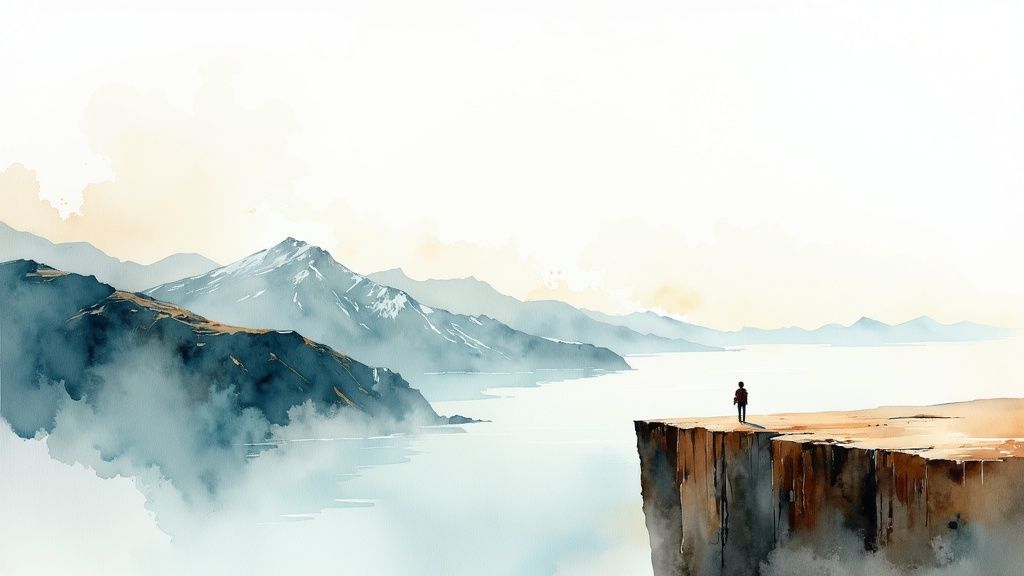
2. Wide Shot (WS) / Establishing Shot
Often used to open a new scene, the wide shot (WS), or establishing shot, is one of the most fundamental types of cinematic shots for providing context. It captures a broad view, showing the subject within their surrounding environment. Its primary function is to orient the audience, answering crucial questions like "where are we?" and "when is this taking place?" before a film delves into closer, more intimate perspectives.
Directors like John Ford and D.W. Griffith popularised the wide shot to immerse viewers in the world of the story. Think of the breathtaking panoramic shots of New Zealand's landscapes in The Lord of the Rings, which established the epic scale of Middle-earth. Similarly, the sprawling desert vistas in Dune use wide shots to convey the planet Arrakis's immense and unforgiving nature, making characters appear small and vulnerable against the epic backdrop.
When and Why to Use a Wide Shot
Use a wide shot at the beginning of a sequence to establish the setting and mood. It’s also effective for showcasing the scale of an action sequence, revealing the spatial relationship between characters, or creating a sense of isolation or grandeur. By pulling back, you give the audience the geographical and emotional context needed to understand the events that are about to unfold.
Actionable Tips for Filming Wide Shots
- Layer Your Composition: Create visual depth by layering foreground, middle-ground, and background elements. This makes the shot more dynamic and immersive.
- Employ Leading Lines: Use natural or architectural lines (roads, rivers, fences) to guide the viewer’s eye towards the focal point of the scene.
- Apply the Rule of Thirds: Place key subjects or points of interest along the intersecting lines of a 3x3 grid to create a more balanced and visually engaging composition.
- Hold the Shot: Give the audience enough time to absorb the visual information. A quick cut on a detailed wide shot can feel jarring and unsatisfying.
NZ Scenario & Practice Exercise
Scenario: You are shooting a short film about a tramper’s journey through Fiordland National Park. An establishing shot from a high vantage point, showing the vast, misty mountains and the tiny figure of the tramper below, will immediately communicate the scale of their adventure and the challenging environment.
Practice: Go to a local park, beach, or city street. Find a spot where you can capture a wide view. Frame three different wide shots of the same location: one at eye level, one from a very low angle, and one from as high as you can get. Notice how changing the angle and height alters the feeling and context of the scene.
3. Medium Shot (MS)
Often called the "workhorse" of cinema, the medium shot (MS) frames a subject from approximately the waist up. It strikes a perfect balance, providing more detail than a wide shot but more environmental context than a close-up. This versatile shot feels natural to the human eye, mirroring how we typically see people during a conversation, making it fundamental to dialogue-driven scenes and character interactions.

Filmmakers like Howard Hawks and Billy Wilder mastered the medium shot to build character and drive narrative. You can see its power in the countless tense conversations in Pulp Fiction or the revealing character interactions throughout The Crown. The medium shot allows the audience to observe a character’s body language and facial expressions simultaneously, providing a comprehensive view of their performance without feeling too distant or uncomfortably intimate.
When and Why to Use a Medium Shot
Use a medium shot as your go-to for dialogue and exposition. It's the ideal framing for scenes where characters are interacting, as it captures their gestures, posture, and facial cues while keeping them grounded in their location. This shot builds a connection between characters and the world they inhabit, making it one of the most essential types of cinematic shots for clear and effective storytelling.
Actionable Tips for Filming Medium Shots
- Frame for Conversation: Position the camera at a natural conversational distance to create a sense of realism and immediacy.
- Watch Your Headroom: Ensure there is a comfortable amount of space above the subject's head without leaving too much of a gap.
- Include Key Background Elements: Use the background to subtly inform the audience about the setting without distracting from the main action.
- Maintain Eyeline Match: When cutting between two characters in a conversation, ensure their eyelines match to create a seamless and believable interaction.
NZ Scenario & Practice Exercise
Scenario: You’re filming a promotional video for a Wellington-based tech start-up. A medium shot of two co-founders brainstorming at a whiteboard is perfect. It will capture their collaborative energy, hand gestures explaining complex ideas, and the innovative atmosphere of their office. It’s a shot that tells a story of both people and place.
Practice: With a friend, stage a simple conversation about planning a weekend trip to the Coromandel. Film the scene using only medium shots, cutting between each person as they speak. Focus on keeping the framing consistent and ensuring the eyelines match. Review the footage to see if the conversation feels natural and engaging. For a deeper understanding of composition, consider exploring practical photography and videography skills with our New Zealand-based short courses.
4. Two-Shot
The two-shot is one of the most fundamental types of cinematic shots for depicting relationships. As its name suggests, this shot frames two characters together, making it an essential tool for dialogue scenes, confrontations, and moments of connection. Its power lies in its ability to show interaction and reaction simultaneously, revealing the dynamic between characters without cutting away.
Filmmakers like Yasujirō Ozu and Mike Leigh mastered the two-shot to explore complex human relationships. Think of the intimate, vulnerable conversations in Moonlight, the shifting allegiances in 12 Angry Men, or the heated depositions in The Social Network. Each example uses the shared frame to expose connection or conflict, allowing the audience to read the subtle interplay between the actors.
When and Why to Use a Two-Shot
Use a two-shot to establish or develop the relationship between two characters. It is perfect for scenes where dialogue and non-verbal cues are equally important. By keeping both characters in the frame, you allow the audience to see how one person's words affect the other in real-time, building tension, intimacy, or comedy. It is less jarring than cutting back and forth, creating a more natural and observant viewing experience.
Actionable Tips for Filming Two-Shots
- Create Depth: Position your subjects at slightly different depths in the frame. Placing one slightly more forward than the other adds visual interest and avoids a flat, stage-like composition.
- Use Height for Power: Frame characters at different heights to subtly communicate power dynamics. A character positioned slightly higher can appear more dominant, while one lower may seem more submissive.
- Balance the Frame: Ensure both characters carry similar visual weight, unless you intentionally want to favour one. Pay attention to how they are balanced within the composition.
- Establish Sight Lines: Arrange the characters so their sight lines connect naturally. This creates a clear and believable interaction, guiding the audience's focus between them.
NZ Scenario & Practice Exercise
Scenario: You're shooting a scene for a short film about two Kiwi entrepreneurs arguing over the future of their Wellington-based tech startup. A tight two-shot in their small office will capture the escalating tension, showing their conflicting expressions and body language as the disagreement unfolds.
Practice: Film a friend and yourself having a simple conversation while sitting at a table. First, film it using single shots, cutting between you. Then, re-film the same conversation using only one static two-shot. Compare the footage. Notice how the two-shot reveals the natural rhythm of the conversation and captures reactions that might have been missed with cuts.
5. Over-the-Shoulder Shot (OTS)
A staple of dialogue-driven scenes, the over-the-shoulder (OTS) shot is a fundamental technique for grounding conversations within a physical space. This shot frames a character from behind the shoulder of another, creating a perspective that connects the two subjects while focusing our attention on the person facing the camera. It’s a workhorse shot that builds a natural rhythm in conversations and maintains spatial relationships for the audience.
Filmmakers like Howard Hawks and Frank Capra perfected the OTS shot to make dialogue feel dynamic and engaging. Modern masters like David Fincher use it to build tension, as seen in the interrogation scenes of The Dark Knight, where the alternating OTS shots between Batman and the Joker escalate the psychological conflict. Similarly, Parasite uses it brilliantly in pivotal conversations to reveal shifting power dynamics between characters.
When and Why to Use an Over-the-Shoulder Shot
Use an OTS shot to create a clear sense of who is talking to whom and to immerse the audience in the conversation. It’s perfect for interviews, dramatic confrontations, or simple back-and-forth dialogue. This type of cinematic shot provides context and perspective, making the viewer feel like a participant in the scene rather than just an observer.
Actionable Tips for Filming Over-the-Shoulder Shots
- Match Your Eyelines: Ensure the character on screen is looking at the correct spot off-camera to create a believable connection with the other person. Mismatched eyelines will immediately disorient the viewer.
- Maintain Consistent Height: When shooting a pair of OTS shots for a conversation, keep the camera at the same height for both characters to ensure visual continuity.
- Subtle Foreground Lighting: Add a small amount of light to the foreground shoulder to give it dimension and separate it from the background, preventing it from becoming a flat silhouette.
- Follow the 180-Degree Rule: Keep the camera on one side of the "line of action" between the two characters. Crossing this imaginary line will confuse the audience’s sense of direction and space.
NZ Scenario & Practice Exercise
Scenario: You’re filming a scene for a local web series set in a bustling Wellington café. Two friends are having a tense discussion over coffee. Using alternating OTS shots will allow you to capture each character's reactions-one's defiant expression and the other's concerned plea-while keeping the lively café atmosphere in the background.
Practice: Partner with a friend and stage a simple debate, like who has the best flat white in town. Position your camera over one person’s shoulder, focusing on the other. Film 30 seconds of their argument, then switch and film the reverse shot. Edit the two clips together, cutting back and forth to create a seamless conversation. Pay close attention to matching the eyelines and camera heights.
6. Extreme Close-Up (ECU) / Macro Shot
Pushing intimacy to its absolute limit, the extreme close-up (ECU), also known as a macro shot, fills the entire screen with a single, magnified detail. This shot isolates a tiny subject, such as a character's eye, a trembling lip, or the intricate mechanics of a ticking watch, forcing the audience to focus on its symbolic or emotional significance. Its power lies in its ability to reveal hidden truths and intensify the psychological state of a scene.
Filmmakers like Darren Aronofsky in Requiem for a Dream masterfully use the ECU to create a visceral, almost claustrophobic experience of addiction. Similarly, David Fincher’s work in Se7en uses extreme close-ups of crime scene evidence to draw the audience into the detective’s obsessive investigation. This type of cinematic shot transforms minuscule details into monumental story points.
When and Why to Use an Extreme Close-Up
Deploy an ECU to punctuate a moment of extreme emotion, reveal a crucial plot detail, or create a powerful sense of unease or intimacy. It is most impactful when used sparingly to highlight a moment of epiphany, terror, or deep contemplation. By abstracting a subject from its context, the ECU can make the familiar seem strange and significant, compelling the viewer to ask why they are being shown this detail.
Actionable Tips for Filming Extreme Close-Ups
- Light for Texture: Careful lighting is crucial. Use side lighting or backlighting to reveal surface textures, whether it’s the fine lines around an eye or the metallic grain of a key.
- Use a Macro Lens: A dedicated macro lens is designed for this purpose, allowing you to achieve sharp focus at very short distances. This is a key piece of kit for capturing professional-grade ECUs.
- Stabilise Your Shot: The slightest movement is magnified at this level of zoom. Use a tripod or gimbal to eliminate camera shake and ensure your shot is perfectly stable.
- Amplify with Sound: Pair your ECU with heightened sound design. The sound of a pen scratching, a clock ticking, or a sharp inhale can elevate the shot’s impact exponentially.
NZ Scenario & Practice Exercise
Scenario: You are shooting a thriller set in a high-tech lab in Wellington. To build suspense, you film an ECU of a scientist’s finger hovering over a red button, sweat beading on their skin, as a digital timer on a screen behind them ticks down to zero. The shot isolates the immense pressure of the moment.
Practice: Find a small, textured object like a kiwi fruit, a piece of pounamu, or a watch. Using your camera’s macro function or a macro lens, film a slow, 10-second pan across its surface. Experiment with different light sources (a desk lamp, natural light from a window) to see how the light reveals or hides its details. Mastering these techniques is a core skill you can develop further through guided learning, and if you are interested in structured training, you can explore skills like this in an online photography course in NZ.
7. Dutch Angle / Canted Angle / Tilted Frame
The Dutch angle, also known as a canted or tilted frame, is one of the more stylised types of cinematic shots. It’s achieved by tilting the camera on its roll axis so the horizon line is not parallel with the bottom of the frame. This simple skewing of the visual plane creates an immediate sense of unease, tension, or psychological imbalance, making it a powerful tool for disrupting the audience's sense of stability.
Popularised in German Expressionist cinema and masterfully used by directors like Carol Reed in The Third Man to create a noir atmosphere of paranoia, the Dutch angle signals that something is fundamentally wrong. Modern examples include its use in Joker to mirror the character's mental deterioration and in Sam Raimi’s Spider-Man films to add a dynamic, comic-book-like flair to disorienting action sequences.
When and Why to Use a Dutch Angle
Deploy a Dutch angle to visually express a character's disturbed psychological state, to convey a sense of danger, or to inject dynamic energy into a scene. It is most impactful when used sparingly at moments of peak emotional intensity, confusion, or threat. Overusing this shot can desensitise the audience to its effect, so reserve it for scenes where you intentionally want to make the viewer feel off-kilter.
Actionable Tips for Filming Dutch Angles
- Be Deliberate with Your Tilt: A tilt between 15 and 45 degrees is typically most effective. Anything less can look like a mistake, while anything more can become overly abstract.
- Combine with Other Elements: Enhance the unsettling effect by pairing the shot with tense music, disorienting sound design, or unconventional framing.
- Use it for a Reason: A Dutch angle should always serve the story. Use it to reflect a character's state of mind or the precarious nature of a situation, not just for stylistic flair.
- Avoid Prolonged Use: This shot is meant to be jarring. Holding a Dutch angle for too long can become visually fatiguing for the audience and lose its narrative impact.
NZ Scenario & Practice Exercise
Scenario: You are filming a thriller scene where a character realises they are being followed through the narrow, winding streets of Wellington's CBD. As they glance back, you can use a quick Dutch angle to heighten their paranoia and the sense of impending danger, making the familiar city streets feel menacing and askew.
Practice: Find a perfectly level hallway or street. First, film a short clip of someone walking down it with the camera perfectly level. Next, refilm the same action, but this time, tilt your camera approximately 30 degrees. Compare the two shots. Notice how the tilted version instantly creates a feeling of unease and tension, even with the same simple action.
8. Point-of-View Shot (POV)
A uniquely immersive cinematic tool, the point-of-view (POV) shot places the audience directly into a character's visual perspective. This type of cinematic shot positions the camera to show exactly what a character sees, effectively making the viewer a participant rather than an observer. Its primary function is to create a powerful sense of subjective experience, aligning the audience's perception directly with the character’s.
Popularised by directors like John Carpenter in Halloween, the POV shot can generate intense suspense, empathy, or disorientation. Think of the terrifying first-person shark attacks in Jaws or the claustrophobic feeling of the protagonist’s paralysis in Get Out. These moments use the POV to erase the distance between the viewer and the on-screen action, forcing the audience to experience the character's fear and paranoia firsthand.
When and Why to Use a Point-of-View Shot
Use a POV shot when you need to heighten tension, build suspense, or forge an unbreakable connection between the audience and a character. It is especially effective in horror and thriller genres to place the viewer in the shoes of either the victim or the villain. It can also be used to convey a character's altered state of mind, such as disorientation or a drug-induced haze, by manipulating the visual information presented.
Actionable Tips for Filming Point-of-View Shots
- Match the Eye-Line: Position the camera at the precise height of the character’s eyes. A child’s POV should be low to the ground, while a tall person’s should be higher.
- Humanise the Movement: Incorporate subtle, naturalistic head movements, shakes, and even blinks (achieved with quick fades to black) to make the perspective feel authentic and human.
- Guide with Focus: Use focus pulls to mimic how a person’s eyes shift attention from one object to another. This directs the audience’s gaze and reinforces the character's thought process.
- Establish Clearly: Before launching into a long POV sequence, use a preceding shot (like a close-up of the character's eyes) to clearly establish whose perspective the audience is adopting.
NZ Scenario & Practice Exercise
Scenario: You're filming a promotional video for a Queenstown bungee jump. A POV shot from a helmet-mounted camera as the person leaps from the platform will capture the adrenaline-pumping, vertigo-inducing experience in a way no other shot can, giving potential customers a visceral taste of the thrill.
Practice: Mount your camera (or phone) to a helmet or a chest harness. Walk through a familiar space, like your home or a local park, and film from your own perspective. Focus on interacting with objects: opening a door, picking up a coffee mug, or looking both ways before crossing a street. Review the footage to analyse how your natural movements translate to the screen and what makes the shot feel believable.
9. Crane Shot / Aerial Shot
Among the most impressive and dynamic types of cinematic shots, the crane shot or aerial shot offers a god-like perspective. Accomplished using a camera mounted on a crane, jib, or drone, this shot allows for fluid, three-dimensional movement through space. Its primary function is to establish epic scale, reveal vast landscapes, or follow action in a way that ground-level cameras simply cannot, creating a sense of grandeur and spectacle.
Popularised by directors like Orson Welles and later perfected by filmmakers such as Martin Scorsese and Alfonso Cuarón, the crane shot can transform a scene. Think of the sweeping reveal of the Two Towers in The Lord of the Rings, the legendary unbroken shot following Henry Hill through the Copacabana nightclub in Goodfellas, or the meticulously choreographed, continuous takes in Birdman. These moments use vertical and lateral movement to immerse the audience completely in the film's world.
When and Why to Use a Crane Shot
Use a crane or aerial shot to give your audience a sense of the full scale of a location, to follow a character moving through a complex environment, or to create a dramatic opening or closing for a scene. It is most effective when you need to convey a feeling of freedom, isolation, or overwhelming odds. By rising above the action, the shot can reveal narrative information, such as the size of an approaching army or the layout of a city, providing critical context to the story.
Actionable Tips for Filming Crane Shots
- Storyboard Your Movement: A crane shot is complex. Plan every movement from start to finish with a precise storyboard to ensure it serves the narrative.
- Move with Intention: Don't move the camera just for the sake of it. Each crane movement should reveal something new or emphasise a specific story beat.
- Slow it Down: A slow, deliberate crane movement often has a more dramatic and powerful effect than a fast one. Test different speeds to find what best suits the scene's mood.
- Combine with Other Shots: Use the crane to transition smoothly into another shot type, like moving from a high-angle wide shot down into a medium shot of a character.
NZ Scenario & Practice Exercise
Scenario: You are filming a promotional video for a Queenstown adventure tourism company. An aerial drone shot that starts close on a jet boat speeding through the Shotover River canyons, then ascends to reveal the breathtaking mountain ranges surrounding it, would perfectly capture the epic scale and thrill of the experience.
Practice: If you have a drone (or even a camera on a monopod to simulate a jib), find an open space like a local park. Start with the camera low, focused on a specific object like a park bench. Slowly raise the camera vertically while tilting down, keeping the object in frame. Then, practice moving laterally while raising the camera. Review the footage to analyse how the change in perspective alters the feeling of the space. To take your skills further, explore composition and advanced camera techniques with an in-depth photography course bundle.
10. Tracking Shot / Dolly Shot / Follow Shot
The tracking shot, also known as a dolly or follow shot, immerses the audience directly into the scene by physically moving the camera alongside, towards, or away from the subject. Rather than zooming, the camera travels through space on a dolly, Steadicam, or vehicle, creating a fluid and dynamic perspective that reveals the environment and maintains a constant spatial relationship with the character. Its primary function is to guide the viewer’s eye and build a sense of continuous, unfolding action.
This technique was masterfully employed by filmmakers like Stanley Kubrick and Martin Scorsese to create iconic, seamless sequences. Scorsese’s famous long take in Goodfellas, following Henry Hill through the Copacabana kitchen, is a textbook example of how a tracking shot can establish character, mood, and setting all at once. More recently, Sam Mendes’ 1917 utilised extensive tracking shots to create the illusion of a single, continuous take, plunging the audience into the visceral reality of the trenches.
When and Why to Use a Tracking Shot
Use a tracking shot when you want to follow a character's journey, reveal new information within a scene, or create a feeling of unblinking realism. It's incredibly effective for building suspense, showcasing the scale of a location, or smoothly transitioning between different points of focus without a cut. By moving with the action, you keep the audience engaged and physically connected to the on-screen world.
Actionable Tips for Filming Tracking Shots
- Plan Your Path: Every movement must have a narrative purpose. Storyboard the camera's path from its starting point to its end point, ensuring it reveals something meaningful along the way.
- Maintain a Natural Pace: When following a person, match the camera's speed to their walking pace. This creates a more organic and believable movement that doesn’t feel robotic or jarring.
- Mark Your Floor: For dolly shots, use tape to mark the start and end positions for both the camera and the actors. Precision is key to achieving smooth, repeatable takes.
- Embrace the Steadicam: For fluid movement over uneven ground where tracks are impractical, a Steadicam or gimbal offers a graceful, handheld alternative that can navigate complex environments.
NZ Scenario & Practice Exercise
Scenario: You are shooting a promotional video for a Queenstown adventure tourism company. A tracking shot following a mountain biker as they navigate a winding forest trail will capture the speed, skill, and stunning scenery in a single, exhilarating take, putting the viewer right in the middle of the action.
Practice: Use your smartphone on a small gimbal or simply hold it as steadily as possible. Have a friend walk from one end of a park to the other. Film them in a continuous tracking shot, moving parallel to them. Focus on keeping them perfectly framed while maintaining a smooth, consistent pace. Review your footage to see how well you managed framing and stability.
10 Cinematic Shot Types Comparison
Beyond the Basics: Your Next Shot at Creative Mastery
You've just navigated the fundamental building blocks of visual language. From the expansive context of a Wide Shot to the intimate detail of an Extreme Close-Up, this exploration of the essential types of cinematic shots provides a robust toolkit for any aspiring visual storyteller. We’ve broken down how a Medium Shot centres the human element, how an Over-the-Shoulder Shot builds connection, and how a Dutch Angle can instantly signal that something is amiss.
But knowing the name of a tool and knowing how to build a masterpiece with it are two different things. The real creative leap happens when you stop seeing these shots as isolated menu items and start viewing them as a visual vocabulary. The true artistry lies not just in selecting the right shot, but in sequencing them to create rhythm, evoke emotion, and guide your audience's perception. A simple conversation can feel tense, intimate, or confrontational purely based on the interplay between shot types.
From Theory to Practice: Synthesising Your Skills
The next step is to move from passive knowledge to active creation. The true measure of your understanding will be your ability to combine these techniques with intent. Think beyond the individual shot and consider the sequence. How does a smooth, elegant Tracking Shot that lands on a character's face create a different feeling than a sudden cut from a Wide Shot to a jarring Close-Up?
Here are some practical ways to start synthesising these concepts:
- Combine Movement and Framing: Try a tracking shot that slowly pushes in from a Medium Shot to a Close-Up during a pivotal moment of dialogue. This technique, often called a "push-in," gradually increases the emotional intensity and focuses the audience's attention on a character's reaction.
- Juxtapose Angles for Effect: Film a simple scene, like someone receiving a piece of news, using contrasting angles. Start with a neutral, eye-level Medium Shot, then cut to a High-Angle Shot to make them appear vulnerable, or a Low-Angle Shot to show their sudden empowerment.
- Tell a Story Without Words: Challenge yourself to film a one-minute scene that conveys a complete narrative arc (a beginning, middle, and end) using only your choice of shots. Use an Establishing Shot to set the scene, Medium Shots and Over-the-Shoulder shots to cover the action, and an Extreme Close-Up to reveal a crucial detail.
Key Takeaway: Mastery isn't about memorising the definitions of cinematic shots; it's about internalising their emotional and psychological impact. Your camera is not just a recording device; it is a tool for interpreting reality and shaping an audience's experience.
Continuing Your Creative Journey
The path to visual mastery is a continuous process of learning, experimenting, and refining your craft. As you grow more confident, you'll start to develop your own unique style, instinctively knowing when to follow the rules and, more importantly, when to break them.
To keep your inspiration flowing and explore more advanced techniques, a wealth of resources is available. For those looking to explore a broader range of creative filmmaking resources and master new techniques, platforms like Short Genius can be incredibly useful for discovering innovative approaches. The goal is to build a rich visual library in your mind that you can draw upon for any project, whether it's a promotional video for your Kiwi business, a creative passion project, or a professional shoot. By deliberately practising and analysing these types of cinematic shots, you are investing in your ability to communicate more powerfully and effectively than you ever thought possible.
Ready to turn your passion for visual storytelling into a practical skillset? Prac Skills offers practical, career-focused online courses, like our Advanced Photography bundle, designed to fit into your busy life. Learn the technical and creative skills you need to capture stunning visuals with confidence. Visit Prac Skills to explore our courses and start your journey today.