December 13, 2025
.webp)
How to Create a Cute Cat Drawing From Scratch
Discover how to create a cute cat drawing with our guide. Get practical tips on shapes, details, and coloring to bring your feline art to life.
Career Development
minutes
How to Create a Cute Cat Drawing From Scratch
So, you’re ready to draw some adorable cats? Brilliant. The good news is, you don’t need a fancy art studio to get started. A few simple, well-chosen tools are all it takes to bring your feline friends to life on the page.
Gathering Your Essential Drawing Tools
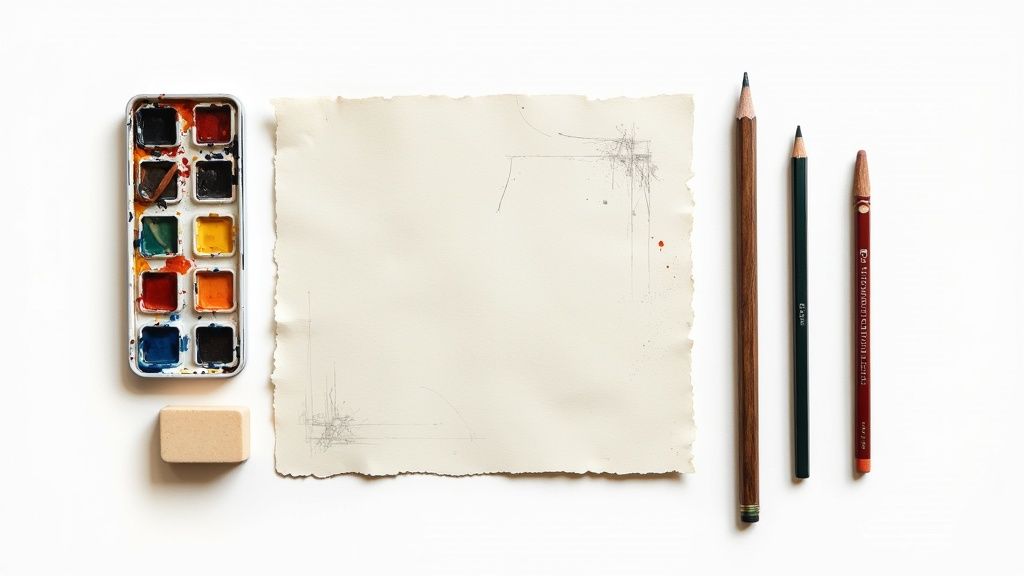
Before you dive in, let's get your toolkit sorted. Having the right gear on hand makes the whole process feel smoother and way more fun. Honestly, a few quality basics will make a huge difference.
Your pencil is your best friend here. A standard HB pencil is perfectly fine for your first rough sketches, but I highly recommend grabbing a softer one, like a 2B or 4B. These glide across the paper beautifully and let you create those darker, more expressive lines and soft, fuzzy shadows. It just feels less rigid and more natural.
Paper choice matters, too. You can doodle on anything, of course, but for a finished piece, try to find a sketchbook with a bit of texture (artists call this 'tooth'). This slight roughness grips the graphite from your pencil, making your shading look richer and your lines less flat. Something around 120 gsm is a great starting point.
Here's a pro tip: your eraser isn't just for fixing mistakes—it's a drawing tool in its own right. A kneaded eraser is fantastic because you can mould it to a fine point to lift out tiny highlights, like that little glint in a cat's eye or the delicate whiskers. It adds a whole new level of life to your sketch.
Your First Cat Drawing Toolkit
To make it even easier, here’s a quick rundown of the gear I recommend. You definitely don’t need everything at once, but this will help you decide what to grab first.
This simple kit is more than enough to get you creating beautiful cat drawings you can be proud of.
Adding Colour to Your Creation
Once you’ve got your sketch down, bringing it to life with colour is where the real personality shines through. You don’t need to break the bank here, either.
- Coloured Pencils: These are my top recommendation for beginners. They give you amazing control, and you can build up the colour intensity by layering different shades. Try blending a light grey with a touch of soft pink for the inside of a cat’s ears—it looks fantastic.
- Watercolour Pans: If you fancy a more illustrative, storybook vibe, a small set of watercolour pans is a great choice. They're super easy to use (just add water!) and are perfect for creating soft, dreamy backgrounds for your feline characters.
And if you’re keen to take your cat drawings into the digital realm, there are some incredible programs out there. Check out this guide to the best digital art software for beginners to see what might work for you.
Whether you stick with pencil and paper or go digital, the most important thing is to have fun with it. And if you ever feel like you want to dive deeper and explore new techniques, taking a look at different creative arts opportunities can be a fantastic way to find new inspiration.
Building Your Cat from Simple Shapes
Every great-looking cat drawing I've ever done started with a simple secret weapon: basic shapes. It’s so tempting to try and sketch a perfect, flowing outline straight away, but that’s a recipe for frustration. Instead, if you break the cat down into simple circles, ovals, and triangles, you build a solid foundation that just looks right before you even think about adding a single whisker.
This approach is honestly a lifesaver for beginners. It stops you from getting bogged down in tiny details too soon and lets you focus on the big picture first—things like proportions and posture. Think of it as creating a mannequin for your cat; you have to get the frame right before you can put the clothes on.
Starting with the Core Shapes
The core of any cat, whether it's snoozing or pouncing, can be mapped out with just a few fundamental shapes. This first pass is all about creating a light, rough guide that you’ll build on top of. Don't press hard!
- The Head: Start with a simple circle. This will form the skull and act as a guide for placing all the facial features later. Don't stress about making it perfect; a slightly squashed or imperfect circle often looks more natural and gives your cat character from the get-go.
- The Body: Next, draw a larger oval connected to the head. The size and shape of this oval will define your cat's entire posture. A long, stretched-out oval creates a cat lounging in the sun, while a rounder, more upright oval suggests a cat that's sitting attentively, watching a bird outside the window.
- The Ears and Limbs: Triangles are your best friend for ears. Just pop two on top of the head-circle. For the legs and tail, you can use long, thin ovals or even simple curved lines just to map out their position and flow.
Getting comfortable with combining these simple shapes is a real cornerstone of learning to draw. Once you nail this, a whole world of creative possibilities opens up. If you're keen to see this in action across different subjects, you can find loads of tutorials covering various practical skills for artists.
Creating Poses with Shape Placement
The real magic happens when you start playing with how these shapes connect to each other. It’s the relationship between that head-circle and the body-oval that determines the entire pose and attitude of your cat.
Want to draw a cat looking over its shoulder? Just overlap the head-circle slightly over the front edge of the body's oval. Easy. If you're aiming for a playful pounce, angle the body-oval upwards and place the head-circle a bit lower down, as if it's about to leap at a toy. You'll be surprised how much personality you can create with these small adjustments.
Here’s a piece of advice I give everyone: draw lightly. These first construction lines aren't permanent. You'll be erasing them later, so use a soft touch with your pencil to avoid leaving deep grooves in the paper.
Once you have these foundational shapes sketched out, you’ve got a solid, well-proportioned base. This simple structure is the roadmap for your entire cute cat drawing, making sure everything is in the right place before you start refining the outline and adding all those charming details that bring your feline friend to life. You’ve successfully turned a blank page into something that already looks like a cat, ready for the next stage.
Bringing Your Drawing to Life with Details
Okay, you've got your basic shapes down. This is where the real fun begins. Right now, you have a simple framework, but in the next few minutes, you’ll start turning that sketch into a charming, personality-filled cute cat drawing.
It’s all about the little details that scream cat. This stage is less about getting every line perfect and more about injecting some character. We aren't aiming for a photorealistic portrait; the goal is to capture that irresistible feline spirit with simple, well-placed lines and curves. You'd be amazed at how a tiny change in an eyelid can shift a cat's expression from curious to sleepy.
This quick progression shows exactly how those foundational shapes logically evolve into a recognisable cat structure.
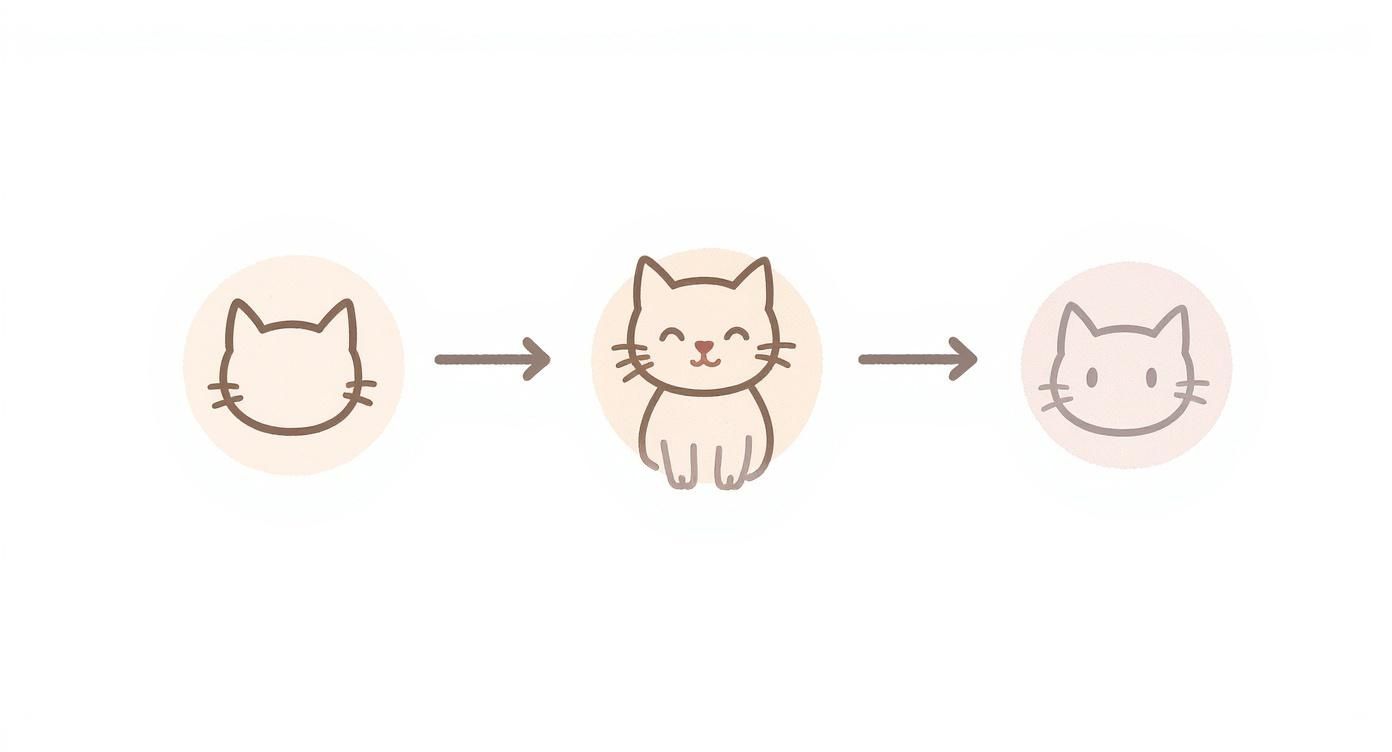
See? Starting with a simple circle and an oval gives you the perfect roadmap for adding all the final, charming details.
Crafting an Expressive Face
The face is where all the magic happens. It’s the focal point of your drawing and where you'll pack in most of the cuteness. Let’s break down the three key features that will make your cat’s personality pop.
- The Eyes are Everything: For that classic cute look, go for large, round eyes. Don't just draw plain circles, though. Add a big pupil and leave a small white circle or two as a highlight. This creates that sparkly, full-of-life look. Pro tip: the bigger the pupils, the more endearing and innocent your cat will appear.
- A Tiny Nose and Mouth: Keep the nose small and simple—a little upside-down triangle works perfectly every time. For the mouth, a simple "w" shape just below the nose is a classic for a reason. This combo keeps all the attention on those big, expressive eyes.
- Delicate Whiskers: Whiskers should be one of the very last things you add. Use quick, confident strokes that start from the muzzle and sweep outwards. Three or four light, curved lines on each side are all you need. Any more can clutter the face.
Remember to gently erase your initial construction lines inside the face before you add these final details. This helps your features stand out cleanly.
Expression is born from subtlety. Tilting the eyes slightly or adding a tiny, lopsided smile can instantly give your cat a mischievous or curious personality. Play around with these small adjustments and see what happens.
Suggesting Fur and Form
You don't need to draw every single strand of hair to make your cat look fluffy. That would take forever! Instead, we can suggest texture with some clever line work.
Along the outline of your cat's body—especially on the cheeks, chest, and tail—try using small, jagged, or feathery strokes instead of one smooth line. This immediately creates the illusion of soft fur without overcomplicating things.
For the paws, think of them as soft, rounded mitten shapes. You can add two or three little curved lines at the front to suggest the toes, which keeps the adorable, simplified look consistent.
Finally, give the tail a gentle, confident "S" curve to hint at movement and playfulness. Adding a few fluffy strokes right at the tip is the perfect finishing touch.
Mastering Colour and Shading Techniques
Alright, your linework is looking sharp. Now for the fun part – bringing your sketch to life with colour and shadow. This is where your cute cat drawing really develops its personality, transforming from a simple outline into a character that feels like it could pounce right off the page.
Don’t get bogged down by complicated art theory. We’re going to focus on simple, effective techniques that make a real difference. Whether you’re working with coloured pencils or watercolours, these core principles will see you right.
Layering Colour for Richness and Texture
If you’ve got coloured pencils in hand, the secret is to build up your colours in light, gentle layers. Forget about pressing hard on your first go; think of it more like whispering colour onto the paper.
Start with your lightest shade and gradually introduce the darker tones. For a ginger tabby, you might begin with a soft yellow base, then layer a light orange over top, and finally use a deep burnt orange for the stripes and shadowed areas. This layering approach creates a richness and depth that a single, flat colour just can’t replicate.
- Create Soft Gradients: To blend colours smoothly, overlap your layers using a light, circular motion. Keep the pressure feather-light.
- Suggest Fur Direction: Let your pencil strokes follow the natural direction of the fur. Use short, flicking strokes for the face and longer, flowing lines for the body to add a subtle hint of texture and realism.
This method does more than just make your colours more vibrant; it also adds a beautiful textural quality that hints at the softness of a cat’s fur.
Remember, your eraser is more than just a mistake-fixer. A kneaded eraser is fantastic for gently lifting pigment to create soft highlights in the fur, adding another layer of dimension.
If you're curious about how light and shadow work across different creative fields, our guide on key principles in New Zealand photography courses offers some great complementary insights you might find handy.
Adding Simple Shading for a 3D Effect
Shading is what gives your drawing form and stops it from looking like a flat sticker. The first thing you need to do is decide on your light source. Just imagine a wee lamp is shining on your cat from the top-left corner. That one simple decision tells you exactly where all your shadows need to go.
Any part of the cat turned away from this imaginary light will be in shadow. This typically includes:
- The area directly under the chin.
- The belly and the side of the body opposite the light.
- The parts of the legs tucked behind the body.
Grab a soft grey or a darker shade of your base colour and gently fill in these areas. This simple step instantly adds weight and dimension, making your cute cat drawing feel much more three-dimensional and real.
Picking up creative skills like this is a fantastic hobby, and you're joining a thriving community. While there's no specific data for 'cute cat drawings,' the wider arts sector here in New Zealand is booming. The Ministry for Culture and Heritage reported that employment in the creative sector grew by 3.8% in 2022, easily outpacing the national average. You can explore more data on NZ's creative sector growth in their full report.
Turning Your Art into Creative Projects
You’ve done it. You’ve sketched, detailed, and coloured an absolutely adorable cute cat drawing. But why let it just live in your sketchbook? The real joy comes from sharing your creativity, and transforming your artwork into something tangible is a fantastic way to do just that.
This isn’t about launching a full-scale business overnight. It’s about taking that proud feeling you have and turning it into something you can hold, give away, or even just display on your own desk. These simple projects are a great way to build a small portfolio or create heartfelt, personalised gifts for friends and family who adore felines as much as you do.
From Page to Product: Simple Ideas
Getting started is so much easier than you might think. You don't need a studio full of fancy equipment—just a good quality scan or photo of your drawing and a splash of imagination. The main thing is to digitise your artwork cleanly so it's ready for printing.
Here are a few straightforward projects to get your creative gears turning:
- Custom Stickers: Who doesn’t love a cute cat sticker? You can print your designs on sticker paper at home or use a local print shop. They’re perfect for decorating laptops, notebooks, or water bottles.
- Greeting Cards: A handmade card featuring your own artwork is incredibly special. Just print your cat drawing onto some decent cardstock, fold it, and you have a unique card for birthdays, thank you notes, or just because.
- Small Art Prints: Turn your favourite drawings into mini art prints. They look brilliant framed on a desk, pinned to a noticeboard, or grouped together on a wall. It’s a simple way to add a personal touch to any space.
Your creative journey doesn't have to stop when the drawing is done. Seeing your art on a physical product is a huge motivator and a wonderful way to celebrate your progress. It makes your skills feel real and valuable.
Preparing Your Drawing for Print
To make sure your projects look their best, you'll want a high-quality digital version of your artwork. If you have a scanner, aim for a resolution of at least 300 DPI (dots per inch). This is the standard for good quality printing and ensures your lines look crisp and your colours stay vibrant.
No scanner? No problem. A good photo will work too. The trick is to take it in bright, even, natural light to avoid weird shadows. Hold your phone or camera directly parallel to the artwork to prevent distortion. You can then use a free photo editing app to crop the image and tweak the brightness and contrast to make it pop.
Beyond these simple projects, you can even think bigger. Imagine your cute cat drawings as physical home decor, like vibrant colorful cat canvas art. It really shows just how far a simple sketch can go.
Taking your art from a private hobby to a shareable product is a hugely rewarding step, and it taps into a growing appreciation for local creativity. In fact, the art scene in New Zealand is expanding steadily. The country's import and export of artwork—which includes drawings just like yours—is projected to hit $95 million by 2026. Since 1994, the supply of art has grown by about 8.1% annually, showing a strong and growing market for creative work. Learn more about New Zealand's art industry outlook and see how your passion fits into this exciting trend.
Got Questions About Drawing Cats?
As you start your creative journey, it’s totally normal for questions to pop up. Drawing a cute cat should be fun and relaxing, not a source of frustration. So, let's tackle some of the common hurdles that trip up aspiring artists.
Getting the proportions right can feel like a bit of a puzzle at first. A classic beginner issue is making the head way too big or comically small for the body. A simple rule of thumb I’ve always found helpful is to aim for the body to be roughly two to three times the size of the head. This little trick helps keep your cat looking balanced and natural, rather than like a bobblehead.
Another common sticking point? The legs. It’s so easy to make them look stiff or just plain awkward. The secret is to think in curves, not straight lines. When you're sketching them out, try using light, flowing ‘S’ shapes. This gives them an immediate sense of movement and flexibility, just like a real cat getting ready to pounce.
Remember, every single artist, no matter how skilled, was a beginner once. The real key is to just embrace the learning process. Don't expect perfection on your first, second, or even tenth drawing. Each sketch is a valuable step forward.
Refining Your Technique
Lots of beginners ask me how to make their cat’s eyes look truly alive. The magic is all in the highlights. Once you’ve coloured in the pupil, grab a white gel pen or use the sharp tip of a kneaded eraser to add a tiny dot of light. This super simple detail instantly creates a sense of depth and personality, making the eyes sparkle. For that classic cute cat look, making the pupils nice and large also adds a wonderful layer of innocence and charm.
But what about making the fur look fluffy without having to draw every single hair?
- Vary Your Outline: Instead of one smooth, continuous line around your cat’s body, use short, feathery strokes. This works especially well in fluffy areas like the cheeks, chest, and tail, and it immediately suggests a soft, cuddly texture.
- Use Directional Shading: When you're adding shadows, let your pencil strokes follow the natural direction the fur would grow. It’s a subtle thing, but it adds a layer of realism and flow that makes a huge difference.
Finally, please don't get hung up on getting things "wrong." Art is subjective, and this is your creation. If the ears are a bit crooked or the tail is extra poofy, that just gives your cat its own unique character. The real goal is to simply enjoy the process of bringing your own adorable feline friend to life on the page.
Ready to turn your artistic passion into a practical skill? At Prac Skills, we offer a range of practical workshops designed to help you grow your talents. Explore our programmes and start your journey today at https://www.pracskills.co.nz.