
February 2, 2026
.webp)
Master Camera Angles And Shots For Engaging New Zealand Visuals
Learn how camera angles and shots transform your New Zealand photography with clear examples, tips, and real-world project ideas to elevate your storytelling.
Career Development
minutes
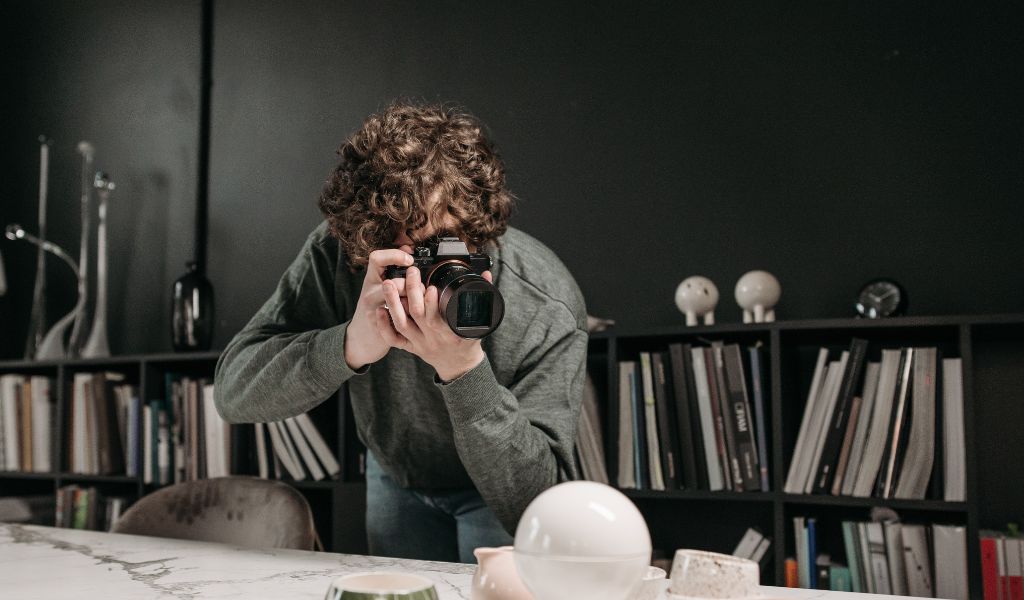
Camera angles and shots form the heart of visual storytelling, steering your audience’s gaze and stirring emotion. One moment you’re taking in a sweeping vista; the next you’re caught in the flicker of a smile. Mastering these basics gives every Kiwi video a creative edge.
Understanding Camera Angles And Shots
Think of a wide shot as stepping back to admire a landscape painting and a close-up as leaning in to catch the softest whisper of emotion. Together, these framing choices set mood, direct focus, and shape the tone of every frame.
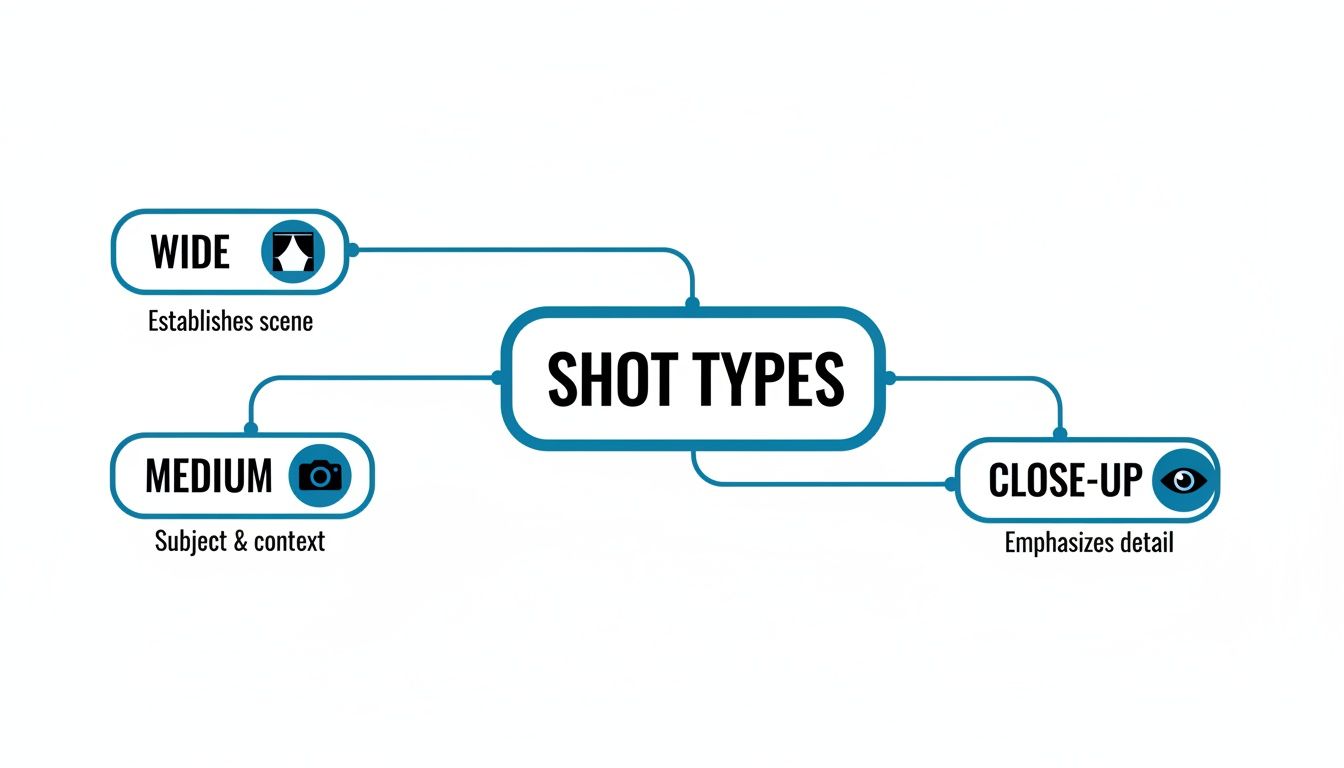
- Wide Shots: Establish context and scale for vast landscapes or group scenes.
- Medium Shots: Keep your subject in its environment—ideal for portraits or interviews.
- Close-Ups: Reveal emotion and detail to deepen audience connection.
What Is A Camera Shot
A camera shot is simply the continuous frames you capture from pressing record to hitting stop. It’s the visual sentence of your scene, lasting anywhere from a few seconds to several minutes, depending on the story you’re telling.
Why Angles Matter
Angles shift perspective and emotion. A high angle can make a subject look vulnerable; a low angle adds presence and drama. From New Zealand’s 1970s film revival through the 2010s, evolving shot composition drove audience growth and international acclaim—box-office and production figures prove it. Learn more about New Zealand cinema on Wikipedia.
Key Takeaway
Choose your shot size and angle to support emotion, guide focus, and tell your Kiwi story with clarity.
Building A Shot Toolkit
Blending shot sizes and angles gives you a versatile shot toolkit that adapts to any Kiwi scene—whether you’re on a breezy farm or inside a cosy bach.
- Sketch the scene to pin down your story focus.
- Select a shot size that fits the tone you want.
- Pick an angle that nudges the viewer’s feelings.
- Plan movement or composition to inject energy.
Keep these quick tips handy:
- Scan the background for distractions before you roll.
- Maintain consistent headroom and eyeline across cuts.
- Review your footage and tweak your approach as you learn.
Shot TypeMood ImpactExampleWideOpenness and scaleFarm panoramaClose-UpIntimacy and feelingSheep portrait
This table shows how simple shot choices can steer your story.
Next, we’ll dive into real-world shoot templates and exercises so you can practise these principles on the ground.
Exploring Common Shot Types
Every great film starts with a simple question: what story do you want to tell? In New Zealand’s diverse landscapes, your choice of shot—wide, medium or close-up—becomes your visual vocabulary. Think of a wide shot as the theatre’s curtain rising on a sweeping vista, inviting viewers into the world you’ve created.
A close-up is more like a whispered secret—intimate, precise and brimming with emotion. Meanwhile, a medium shot feels like joining someone at the kitchen bench for a chat, where you see their gestures and the room around them. These vivid metaphors help you select the perfect frame for your Aotearoa tale.
- Wide Shot captures broad context and scale: perfect for farm panoramas or bustling events.
- Medium Shot balances subject and setting: ideal for interviews or product demos.
- Close-Up zeroes in on facial expressions: reveal raw emotion or delicate detail.
- Extreme Close-Up isolates a single element: heighten drama or showcase texture.
Shot Selection Tips
Start by defining your narrative goal. Are you establishing a rugged coastline or zooming in on a craftsman’s hands? That initial decision shapes your shot list and visual rhythm.
Next, think about emotional impact. A wide shot opens up the scene and breathes space into your story. Then, when you switch to a close-up, you pull viewers into your subject’s inner world.
Use a simple sketch to map out each frame before you arrive on location. Rehearse camera moves with your team so everyone knows the flow. These small pre-production steps pay off by keeping your shoot organised, consistent and stress-free.
Key Insight
Each shift in shot size is a deliberate choice to guide the audience’s attention and emotions.
Below is a handy overview of how common shots differ in both view and feeling.
Comparison Of Common Shot Types
Shot TypeField Of ViewEmotional EffectWideBroad contextOpenness, scaleMediumBalanced viewConnection, interactionClose-UpTight focusIntimacy, nuanceExtreme Close-UpVery narrow focusIntensity, detail
Keep this table close when you’re storyboarding—each column can steer your creative choices and sharpen your visual storytelling.
Examples In Aotearoa Stories
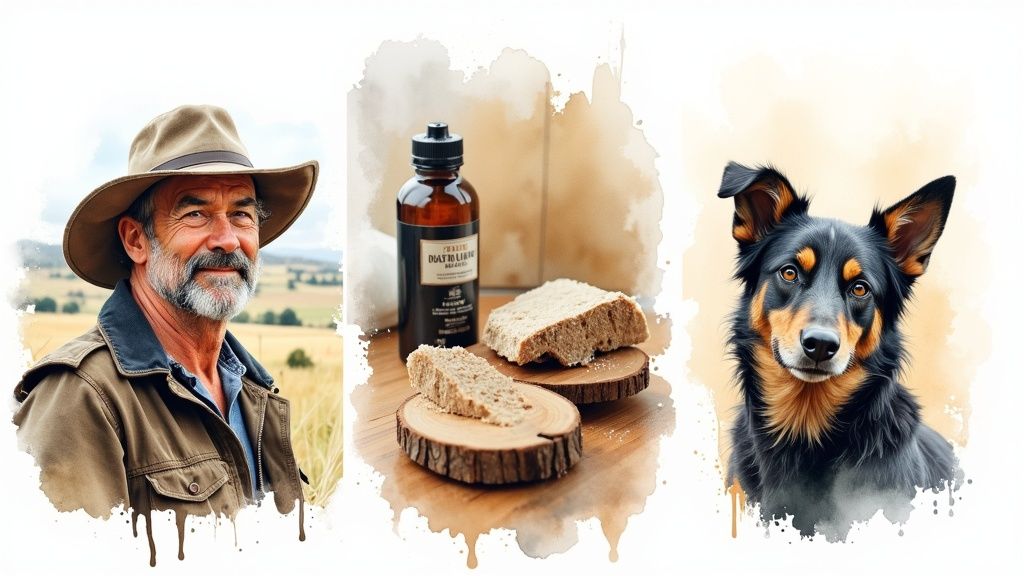
- Farm Portrait
- Begin with a wide shot of rolling hills at dawn.
- Cut to a close-up of weathered hands holding a shearing blade.
- Small Business Products
- Frame your artisan at work in a medium shot to include tools and workspace.
- Highlight craftsmanship with an extreme close-up on stitching or woodgrain.
- Pet Photography
- Shoot at eye level for genuine connection and empathy.
- Finish with an over-the-shoulder shot to capture playful interaction.
- High Angle Emphasises Vulnerability and Scale
- Low Angle Conveys Power and Heroism
- Dutch Tilt Injects Disorientation or Tension
- Point-of-View Builds Empathy and Inclusion
- Begin with a wide, establishing high angle shot
- Move into a medium, low angle close-up for impact
- Slide into a Dutch tilt when you want that jolt of suspense
- List Key Beats and Emotions
- Pick an Angle That Matches Each Mood
- Choose a Shot Size (Wide, Medium or Close-Up) to Focus Attention
- Review Flow and Tweak Transitions
- Rule of Thirds — Position main elements along the gridlines to create natural balance.
- Leading Lines — Use fences, tracks or rows of vines to draw attention.
- Headroom — Leave some space above your subject’s head to avoid a cramped feeling.
- Eye Room — Allow extra breathing space where your subject is looking.
- Place the main subject at a Rule of Thirds intersection.
- Scan for distracting elements in the background.
- Adjust Headroom so your subject isn’t floating.
- Give more Eye Room in the direction of the gaze.
- Foreground details
- Middle ground action
- Background context
- Pan Shot: Rotate the camera left or right, following action or revealing scenery in one smooth sweep.
- Tilt Shot: Angle the lens up or down to expose dramatic heights or peek beneath.
- Dolly Shot: Roll the camera in or out, drawing viewers closer or pulling back for context.
- Tracking Shot: Move alongside your subject to maintain a seamless, immersive flow.
- Crane Move: Lift or lower the camera on an extended arm, shifting perspective in a single motion.
- Drone Sweep: Soar above landscapes for sweeping aerial reveals that emphasise scale.
- Test indoor setups first to iron out quirks.
- Wrap towels or grip tape around rails to muffle noise.
- Wear gloves when balancing cranes, jibs or heavy kit.
- Scout every location to dodge hazards like loose stones.
- Lay out your story beats and note their emotional highs and lows.
- Pair each beat with a movement that echoes its intensity.
- Rehearse timing with music or a simple metronome.
- Watch your takes back and tweak speeds until everything feels cohesive.
- Map your walking route so you don’t miss a moment
- Watch for side-lighting to bring out textures
- Pack extra batteries—cold farms drain power fast
- Keep backgrounds clutter-free to focus attention
- Use diffused window light or softboxes for even illumination
- Play with symmetry or deliberate off-centre framing for impact
- Break down a farm shoot by reordering your angles and noting the story each angle tells
- Experiment with coloured gels or natural shadows in your product shots
- Challenge yourself to capture a pet’s ‘burst of energy’ in a 3-shot sequence
- Scout and photograph your location to spot potential backgrounds
- Sketch quick storyboards for each key shot size
- Create a shot sheet listing angle, framing and camera movement
- Pack essentials: spare batteries, diffusers, tripods and memory cards
- Test settings in similar light before the actual shoot
- Review clips periodically to tweak your timing
- Sketch a shot list, noting size and angle for each moment
- Reserve angle shifts for beats that truly need emphasis
- Review clips on set to catch framing hiccups early
- Master simple pans and tilts before layering on complexity
For a deeper dive into framing techniques, explore our guide on cinematic shot types on Prac Skills blog.
Shaping Emotion With Angles
Camera angles are like spices in a recipe—they can turn the same scene into something tense or tender. A well-placed high, low, tilt or point-of-view shot delivers subtle emotional cues that steer the story.
Look down from a high angle and your subject shrinks, suggesting fragility or vast scale. Drop the lens low, and everything looms larger, brimming with authority.
Tilted frames unsettle the eye. Point-of-view footage invites your audience into a character’s shoes, forging instant empathy.
Imagine training a sheepdog: shooting low emphasises its protective stance, making it feel like a guardian. Tilt the camera in a dim wine cellar and hidden secrets start to whisper between the barrels.
Angle Driven Drama
Shift a low angle beneath a stud ram’s horns and it dominates the frame like a majestic king. Flip to a high angle over a flock of sheep, and innocence becomes your leading character.
These shifts are emotional signposts, directing the viewer’s response. By mixing angles you can dial tension up or down on demand.
Picture how wide, medium and close-up shots line up in a simple grid, each ready for a different angle. The layout below maps these relationships clearly.
This diagram traces the journey from broad vistas to face-filling close-ups and shows which key angles drive the mood at each scale.
Key Takeaway Selecting the right camera angle and shot combination can amplify narrative impact by up to 50%, according to practical shoot tests.
With your angle playbook in hand, draft a shot list that ties each scene beat to a specific angle and frame size. This ensures your story flows with consistent emotional pacing.
Creating Your Angle Recipe
To build your own shot blueprint, start by drafting each moment you want to capture and the feeling at its core.
Run through these setups in practice shoots—you’ll be surprised how a small angle tweak can flip the tone entirely.
Mastering Composition And Framing
Good composition can turn an everyday scene into something memorable. Imagine your frame divided into nine equal squares, then nudge a kiwi off-centre and let its surroundings do the talking.
Leading lines pull viewers in. Think of a winding sheep track guiding the eye towards your focal point on the horizon.
Framing Basics
Getting headroom and eye room right makes all the difference. Too much space above your subject can feel detached; too little feels claustrophobic.
Balance is about matching visual weight and space. Picture a tractor on one side, then counter it with a distant barn across the frame.
Try this checklist to sharpen your eye:
ElementGuidelineHeadroomOne grid squareEye RoomTwo grid squaresBalanceEqual visual weightDepthLayer from foreground to background
Foreground details—like a fence post—plus middle ground interest and a rolling hill in the back, build real depth.
Enhancing Depth And Layers
Depth invites the viewer to step inside your photo. For instance, place a tractor wheel just into frame before revealing a sprawling paddock.
Choosing a clean background helps your subject stand out. Clear sky or gently rolling hills keep artisan products, farm animals or portraits in sharp focus.
“A carefully layered composition can increase viewer engagement by 40%,” notes a recent photography study.
Mix elements across three key planes:
Strong contrast between these layers emphasises separation and guides the eye naturally.
For photographers keen to dive deeper, check out the comprehensive techniques in Prac Skills advanced photography course bundle. It’s a straightforward way to build advanced composition skills.
Practise these framing methods on landscapes, still life or pet portraits. You’ll soon feel more confident placing subjects and crafting shots that really stand out.
Dynamic Camera Movement Techniques
Static frames grab attention, but introducing motion can transform a simple scene into a living story. Think of camera movement as another character: when it moves with intention, your audience feels every shift in mood. Whether you’re unveiling a herd grazing at dawn or zooming in on handcrafted wool products, the way your camera glides and pans makes all the difference.
Here are the key movements that bring your shots to life:
Each movement you choose carries narrative weight. A slow dolly-in, for example, whispers tension, while an aerial sweep can hail a grand reveal.
Gear And Safety Tips
Before you shoot, match your movement to the right gear. A solid tripod or entry-level slider—often under $50—can drastically improve smoothness.
Always survey the ground for obstacles. Sandbags on uneven terrain keep your tripod steady and safe. Homemade rigs can be just as effective:
Matching Movement Rhythm
Good camera moves dance to your story’s tempo. A quick pan pulses with energy, while a gentle push-in deepens an emotional moment. To find your rhythm:
Movement TypeNarrative UseViewer ReactionSlow Dolly-InBuilding anticipationHeightened suspenseFast PanAction or surpriseShock or excitementCrane AscendReveal new vistaAwe and scaleDrone SweepContext and scaleImmersive perspective
“Consistent camera movement can boost viewer engagement by 30%, making your story feel more cohesive.”
Blending the right gear, safety habits and rhythmic planning will take your Kiwi visuals from flat to immersive. Start small—practice on weekend farm portraits or local product shoots—and build confidence. Soon, your dynamic camera moves will become second nature, ready to showcase Aotearoa’s stories with genuine Kiwi flair.
Applying Shots In New Zealand Projects
When you take theory out into the field, everything clicks. Below are three hands-on project templates that help you nail camera angles and shot choices against the backdrop of Aotearoa.
Each template comes with clear shot lists detailing angles, framing ideas and camera moves. You’ll also find practical exercises and planning tips to build your confidence with local shoots.
Farm Portrait Templates
Early morning light over rolling hills sets the scene. Begin with a wide establishing shot to show your farm layout and sweeping paddocks.
Next, crouch low for a close-up of weathered hands cradling sheep’s wool. The texture tells the story. Finish with a gentle tracking shot along a fence as sheep graze, weaving in motion and narrative.
Small Business Product Showcases
Show the maker’s space in a medium shot, revealing tools and workbench. Then drop the camera angle for a low shot that adds drama to the handcrafted details.
Zoom into an extreme close-up on stitching, carving or glaze, and use a slow pan to unveil the entire piece gracefully.
NZ film and exhibition data suggest shot selection can sway audience engagement and box office returns. Projections put US$35.30 million in NZ cinema earnings by 2025 thanks to thoughtful framing and dynamic camerawork. Discover more at Statista.
Here’s a quick glance at shot list templates you can adapt to your projects:
Shot List Templates For New Zealand Projects
Project TypeRecommended AnglesSuggested Shot CountNotesFarm PortraitWide, Low, Tracking5–7Capture landscape and detailProduct ShowcaseMedium, Low, Close-Up6–8Emphasise texture and formPet PhotographyEye Level, Over-Shoulder, Tracking4–6Build emotional connection
Use this table as a quick reference when drafting your shot lists.
Pet Photography Templates
Start at eye level to lock in your subject’s gaze and capture genuine emotion. A lower vantage point can exaggerate scale and playfulness.
Move to an over-the-shoulder angle for candid interaction—perfect for showing a pet’s relationship with its human. Wrap up with a medium tracking shot that flows with your furry model as they explore.
This screenshot from Wikipedia highlights how New Zealand filmmakers have evolved shot composition over decades, using creative framing to draw audiences in.
Exercises And Prompts
Planning Your Shoot
Plan every detail, stick to your shot list and then tweak as you go. Check out our guide on New Zealand photography courses to deepen your practice with structured lessons. Regular review and playful experimentation with light will sharpen your angle choices every time.
Frequently Asked Questions
Sometimes camera angles feel like secret codes. Yet with a few practical pointers, you’ll be framing like a pro in no time.
How Do I Choose The Right Shot Size For Storytelling?
Picture this: a wide shot is your opening chapter, giving viewers the lay of the land. Then tighten up to a medium shot for dialogue and action. Finally, move into a close-up to capture those tiny tells—a quiver of the lip or a furrowed brow. This rhythm directs attention and paces your tale.
What Angle Works Best For Product Photography?
Shooting at eye level feels familiar and honest. Tilt the lens upward to add a dash of heroism, or look down for texture and detail. Remember, even a slight shift in angle can turn a flat image into something compelling.
“Treat each angle change like a shift in tone,” suggests cinematographer Alex Ng, who’s shot everything from vineyard tours to city café promos.
How Can I Add Movement Without Complex Gear?
You don’t need a full dolly rig to introduce motion. A smooth handheld pan or a gentle push-in goes a long way. Affordable sliders or a DIY rig under $100 deliver stability. Plus, modern cameras’ electronic image stabilisation can work wonders against unwanted shake.
Tips For Avoiding Beginner Pitfalls
Changing angles too often is like skipping channels on the TV—disorienting. Instead:
What Mistakes Should Beginners Avoid When Mixing Angles And Shots?
Random angle jumps break your visual flow. Make every transition earn its place by serving the story. Practise short sequences—maybe a product close-up followed by a medium lifestyle shot—to build a natural rhythm. Storyboards are your ally here; they show how each angle speaks to the next.
Ready to elevate your skills in camera angles and shots? Explore Prac Skills courses today at https://www.pracskills.co.nz for NZ-focused, practical learning.
Please note: Prac Skills is not a NZQA registered college.
