
February 2, 2026
.webp)
A Kiwi's Guide to the Perfect Mixing Concrete Ratio
Master the mixing concrete ratio for any DIY project in NZ. Our guide covers common mixes, water-to-cement balance, and practical tips for a flawless finish.
Practical Skills
minutes
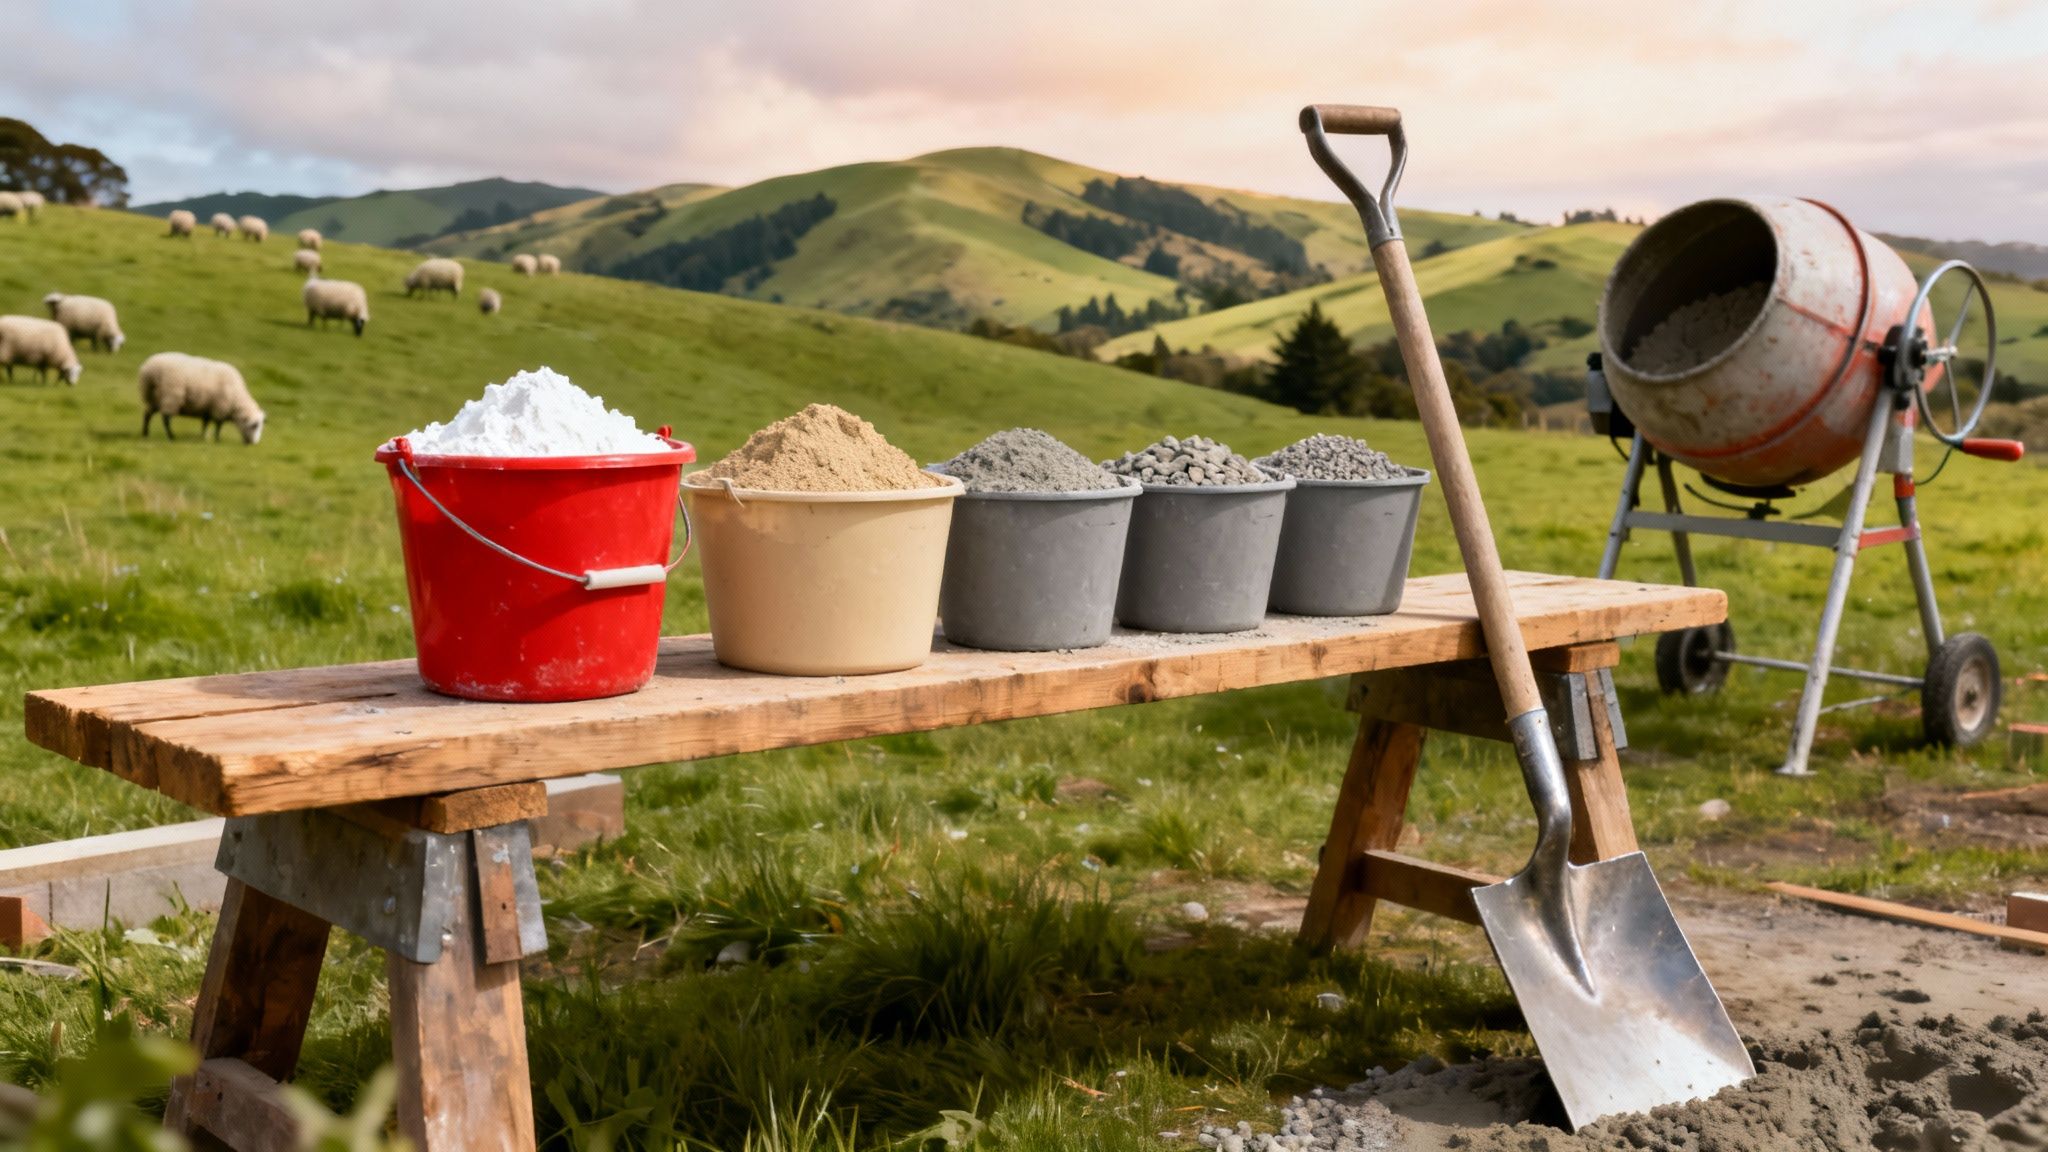
If you’re tackling a DIY concreting job, the one ratio to remember is 1:2:4. That’s one part cement, two parts sand, and four parts aggregate. It’s the go-to recipe for most general-purpose tasks and gives you a strong, reliable mix for things like fence posts, small paths, or a solid foundation for your garden shed.
Why Your Concrete Mix Ratio Matters
Diving into a concrete project can feel a bit daunting, but almost all of its success hangs on one thing: the mix ratio. This isn’t just a rough guideline; it’s the formula that determines the final strength, how easy it is to work with, and how long it’ll last. Get it right, and you’ll end up with a slab that’ll be around for decades. Get it wrong, and you’re looking at cracks, crumbling, and a frustrating (and expensive) do-over.
At its heart, concrete is a simple combination of key ingredients:
- Cement: This is the glue. It's the powder that reacts with water to bind everything together.
- Sand (Fine Aggregate): The sand fills in all the little gaps between the larger stones, creating a denser mix.
- Aggregate (Coarse Aggregate): Usually gravel or crushed stone, this is the real backbone of the concrete, giving it its bulk and strength.
The magic really happens when you get the proportions of these ingredients just right. Each one has a critical job to do, and the ratio ensures they all work in harmony to form a solid, durable mass. It’s a bit like baking a cake – if you use too much flour, it’s dry and crumbly, but too little and it just won’t hold its shape.
Understanding the Numbers
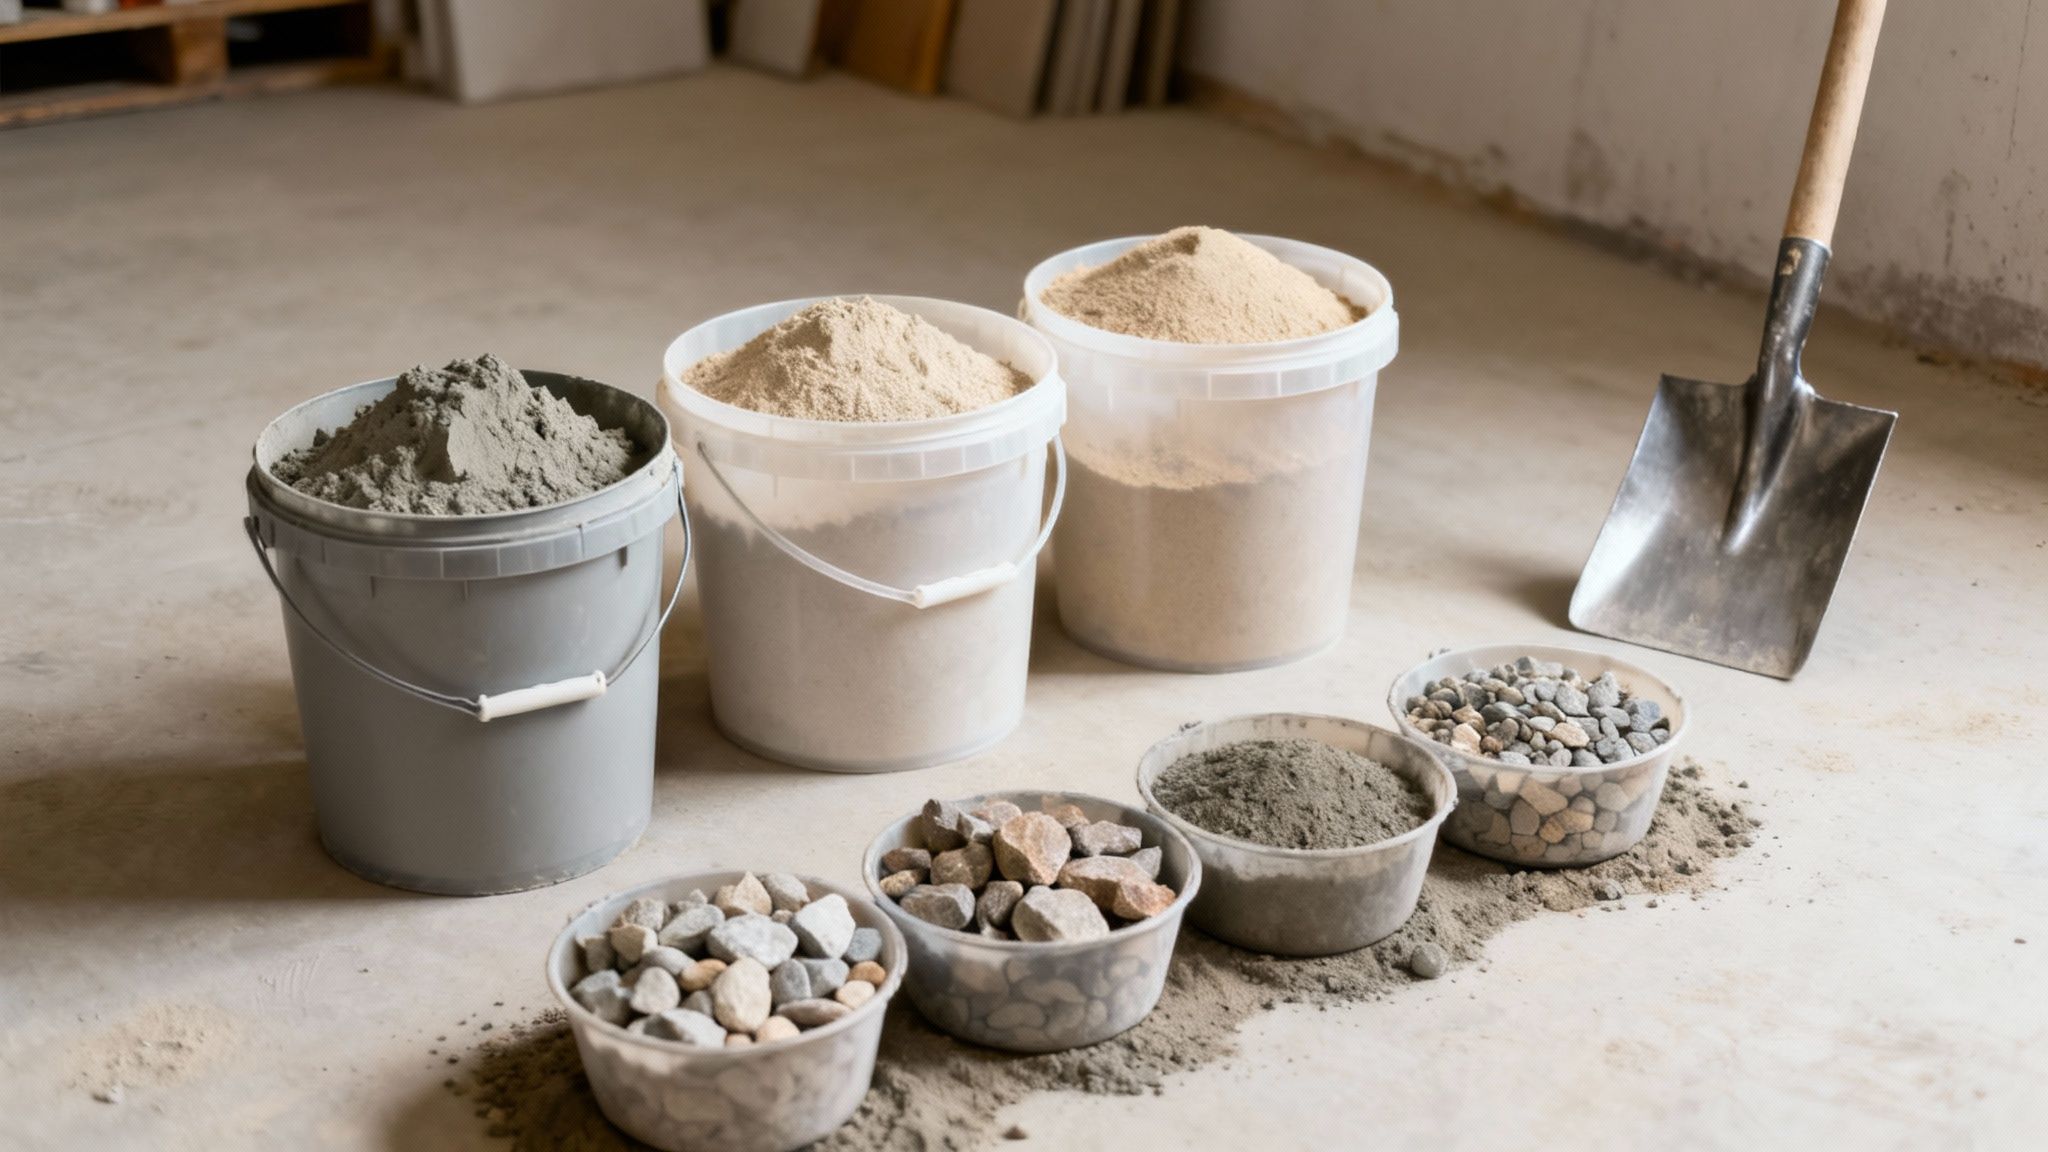
When you see a ratio like 1:2:4, the numbers refer to parts by volume, not weight. This is fantastic news for the Kiwi DIYer because it means you don't need any fancy scales. A "part" can be anything you want, as long as you're consistent. A 10-litre bucket, a shovel-full, an old ice cream container—it doesn’t matter. Just use the same measure for each ingredient, and your proportions will be spot on.
This simple volume-based approach turns what could be complex chemistry into a straightforward, practical task. Here in New Zealand, old-school nominal mixes like the 1:2:4 (which gives you a strength of around 15 MPa) have been the standard for small jobs for years. It's worth noting, though, that the official standard (NZS 3104) was updated around 2021 to provide more reliable specifications, but for most backyard projects, the traditional ratios are still perfectly fine.
Getting the ratio right is non-negotiable. It is the single most important factor in determining the final strength of your concrete, even more so than the mixing technique or curing process.
Real-World Implications
So, what happens if you stray from the recipe? A weak mix, usually caused by skimping on the cement or adding too much sand, will be porous. It won't stand up to much weight and will be vulnerable to breaking down, especially with our winter frosts. On the flip side, a mix that's too rich in cement might seem extra strong, but it can become brittle and is far more likely to develop shrinkage cracks as it cures.
Finding that sweet spot is what it’s all about. Once you have the basics down, you can dive deeper with resources like a comprehensive guide to rural concrete, which offers great insights for different applications. If you're keen to build up your knowledge, we also have plenty of other articles covering a range of practical skills.
Choosing the Right Concrete Mix for Your Project
The secret to a great concrete job is knowing that one size never fits all. The specific mixing ratio you land on will directly control the concrete's final strength and how easy it is to work with. Getting this match right is the difference between a project that lasts a lifetime and one that starts falling apart way too soon.
Think about it: a simple garden path that only ever sees foot traffic doesn't need the same brute strength as a driveway slab that has to support a two-tonne ute. Using a high-strength mix for the path is just overkill—a waste of good cement. But use a weak, lean mix for the driveway, and you're just asking for cracks and headaches down the line.
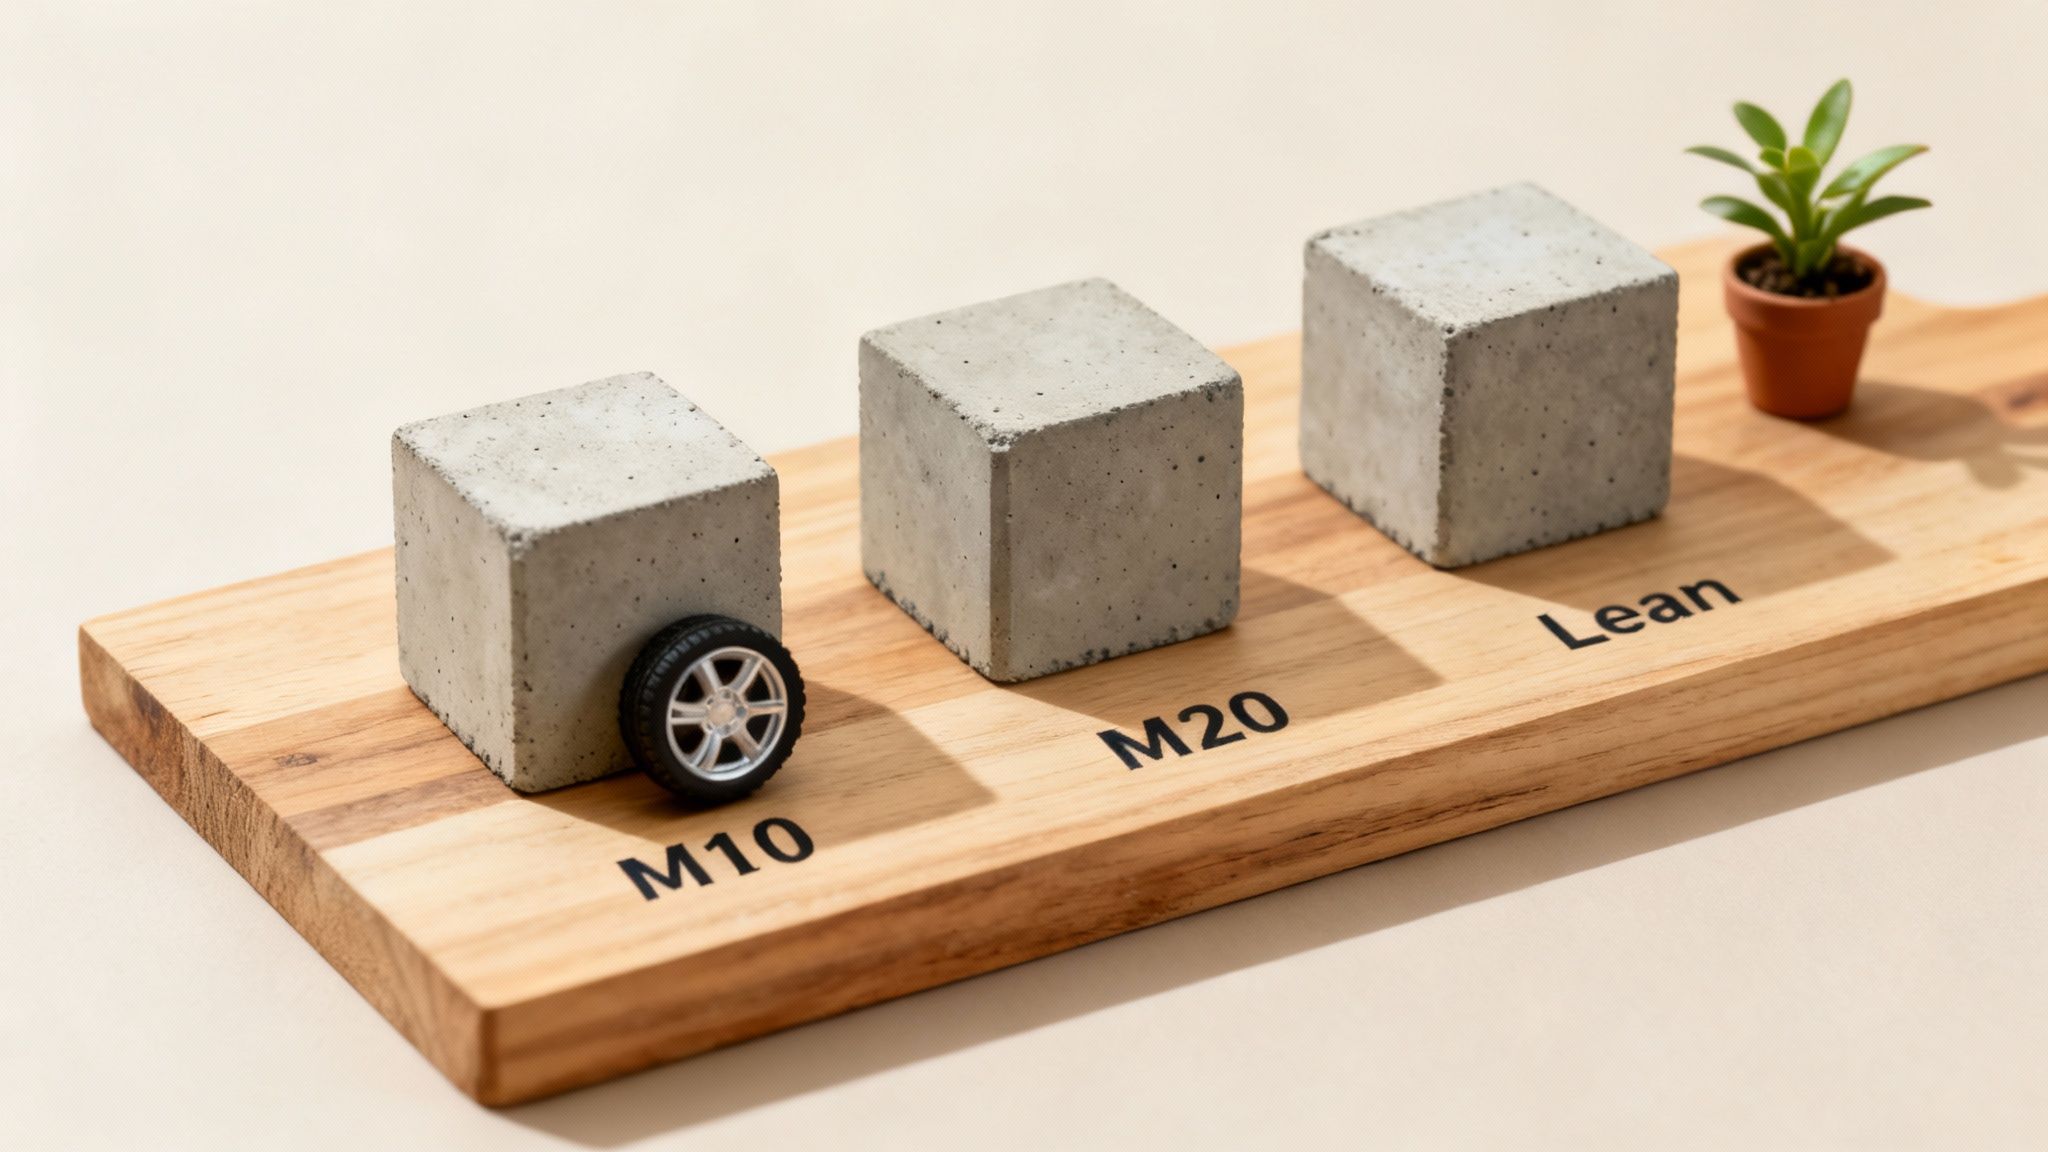
Decoding Concrete Strength Ratings
You'll often hear concrete strength talked about with an 'M' rating, like M15 or M20. This number is all about the concrete's compressive strength in megapascals (MPa) after it has fully cured for 28 days. In simple terms, it tells you how much pressure the concrete can handle before it gives up.
- Higher MPa: This means stronger, more durable concrete. It's what you need for high-stress jobs.
- Lower MPa: This is perfectly adequate for general, non-structural work where the loads are light.
An M10 mix (around 10 MPa) is great for things like setting non-structural posts or pouring a small mower strip. But you’d want to step up to something like an M20 mix (20 MPa) for a driveway or a workshop floor that needs to stand up to heavy loads and vehicle traffic.
Matching the Mix to the Job
Let's look at a few real-world scenarios to see how picking the right mixing concrete ratio makes all the difference.
Choosing the correct mix isn't about always picking the strongest one; it's about selecting the smartest one. The right ratio gives you the performance you need without wasting materials or money.
Imagine a farmer pouring a concrete base for a water trough. Durability is key. The concrete will be constantly wet and kicked about by livestock, so a robust, dense mix like a 1:2:3 is a solid choice. It delivers both good strength and decent water resistance.
On the other hand, if you're mixing up some mortar to lay a block wall, pure strength isn't the priority—workability is. A mortar mix uses a lot more sand (say, 1 part cement to 4 parts sand) to create a smooth, sticky consistency that’s easy to trowel and butter onto the blocks.
Here in New Zealand, many small-scale projects rely on standard prescribed mixes. These are basically straightforward recipes designed for reliability without needing a whole lot of complex engineering. Under NZ standards, prescribed mixes generally top out at 25 MPa, using fixed ratios that are perfect for non-critical jobs like farm slabs or animal shelters.
Remember, practical skills—whether in construction or fields like horticulture—often boil down to really understanding your materials. If you're keen on expanding your hands-on knowledge, you might find our courses on horticulture useful for other outdoor projects.
How to Mix Concrete by Hand or with a Mixer
Once you’ve picked the right concrete mix ratio for your job, it's time to get your hands dirty. Whether you're using a trusty wheelbarrow or a mechanical mixer, the mission is the same: create a perfectly consistent, uniform batch where every single grain of sand and stone is coated in cement paste.
The method you choose really comes down to the size of your project. For little jobs like setting a single post or patching a garden step, mixing by hand is absolutely fine. But for anything bigger than a few wheelbarrow loads, do your back a favour and hire a cement mixer. You’ll save a world of effort and end up with a much better, more consistent final product.
Hand Mixing vs Cement Mixer: Which Is Right for You?
Deciding whether to mix by hand or hire a mixer can make a huge difference to your project's timeline and the quality of the finish. For small, quick jobs, the simplicity of a wheelbarrow can't be beaten. But as soon as the volume starts to creep up, a mixer becomes an indispensable tool, ensuring every batch is identical and saving you from a lot of physical strain. This table breaks down the key factors to help you choose.
Ultimately, if your project involves more than about 0.25 cubic metres of concrete (roughly 12-15 bags of cement), a mixer is the way to go. It’s not just about saving your energy; it's about guaranteeing the quality and strength of your concrete from the first batch to the last.
The Art of the Perfect Consistency
The single biggest mistake people make when mixing concrete is getting the water content wrong. It’s so tempting to add a bit more water to make the mix easier to shovel and spread, but this is a critical error. Sloshing in extra water dramatically weakens the final concrete by messing up the water-to-cement ratio, making it more porous and prone to cracking down the line.
Your goal is to achieve what's called a 'workable slump'. This is the sweet spot where the mix is wet enough to be poured and worked into your formwork, but stiff enough that it holds its shape. A good mix should look like a thick, heavy porridge—definitely not a runny soup. A great test is to drag a shovel through it; the groove should mostly hold its shape without collapsing or filling up with water.
Think of it like this: the water is only there to kick-start the chemical reaction (hydration) that makes cement work. Any extra water that doesn't get used in the reaction just evaporates, leaving behind tiny voids that weaken the entire structure.
Preparing for the Mix
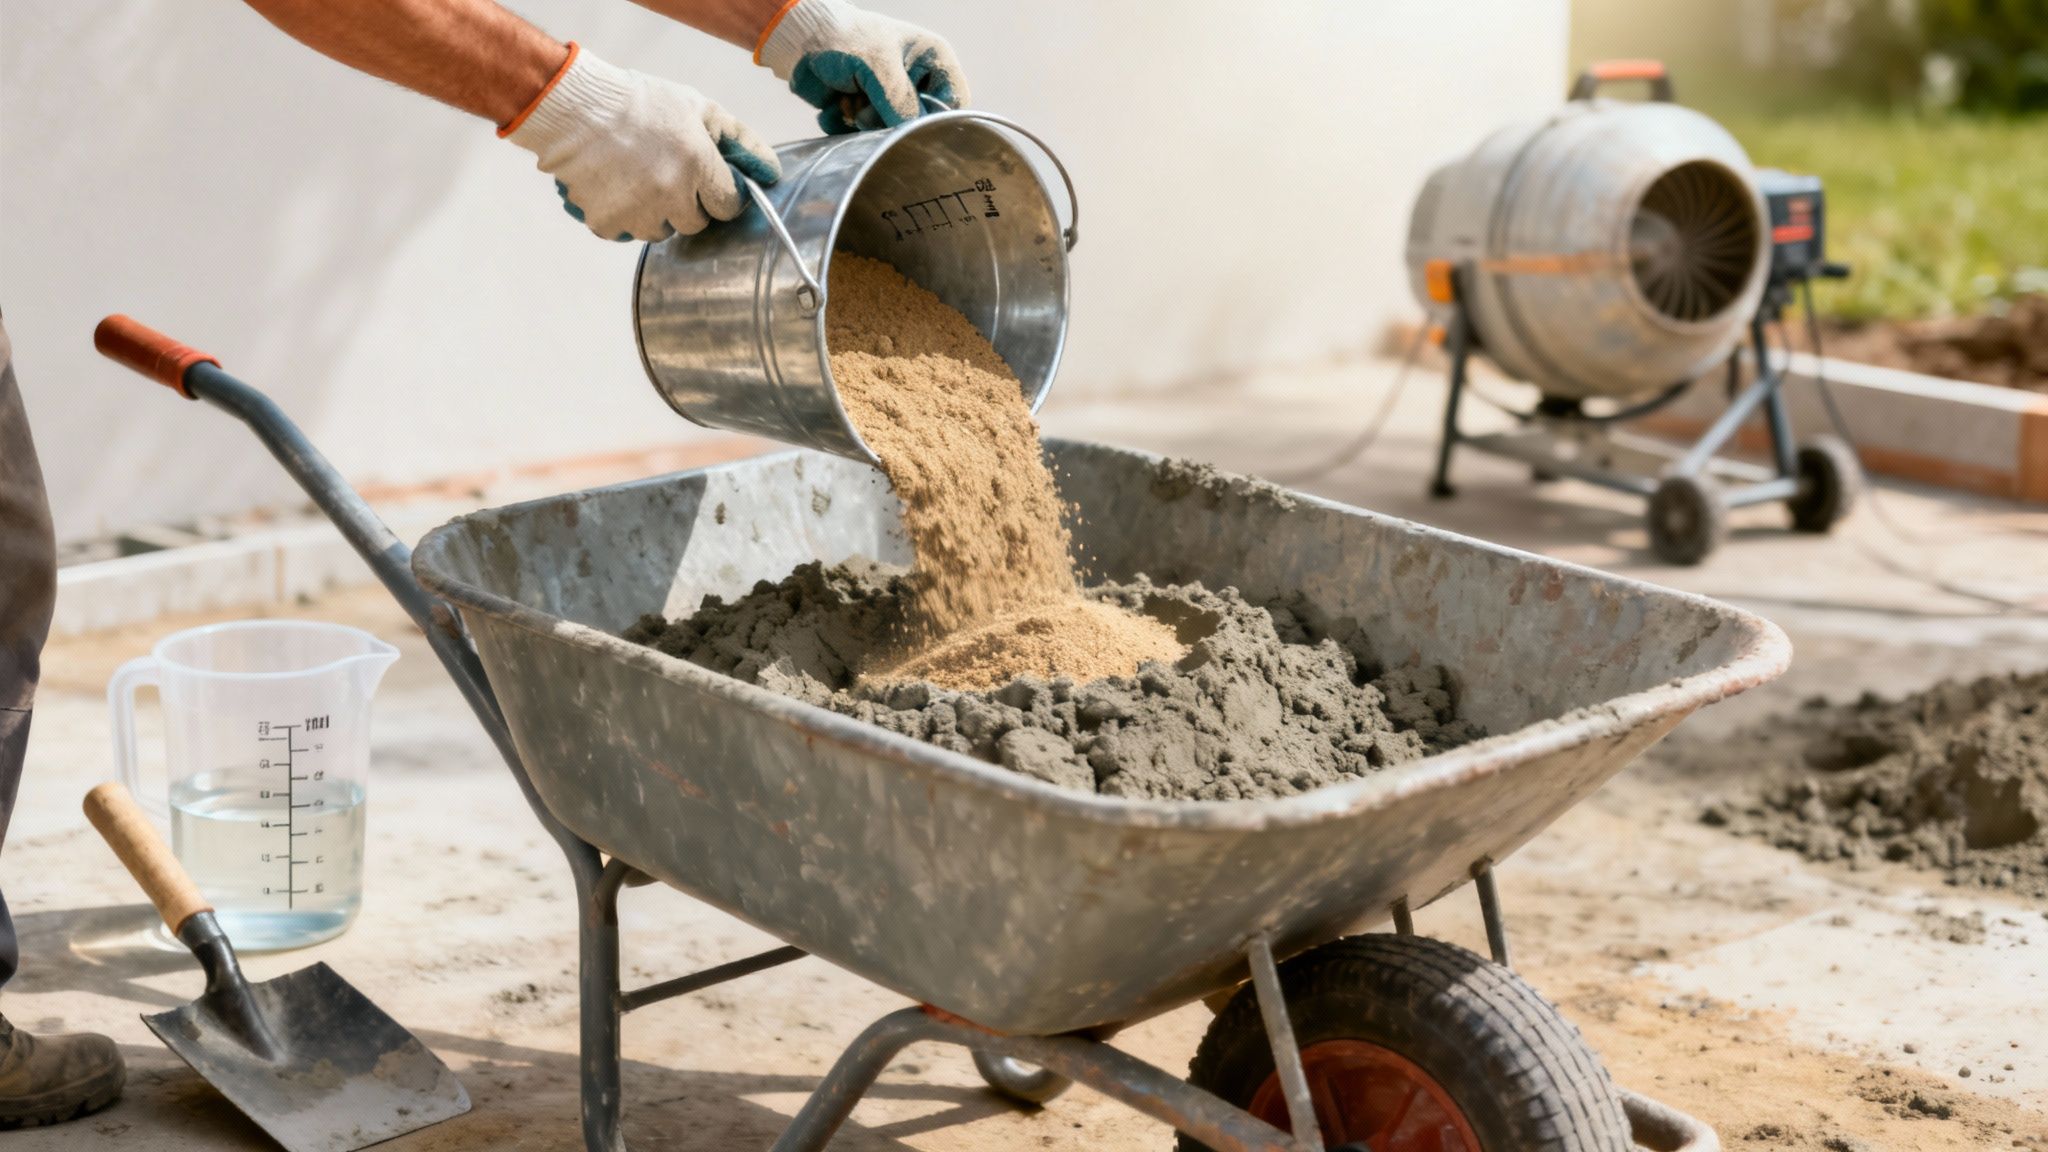
A little bit of prep work before you start will make the whole process smoother. Make sure your mixing area is clean and on level ground, which is especially important if you're battling gravity with a wheelbarrow. Get all your materials close by—cement, sand, aggregate, and a bucket of water. You don't want to be running around looking for things mid-mix.
The golden rule here is to combine all your dry ingredients first. Whether in a wheelbarrow or a mixer, start by adding your aggregate and sand, then tip the cement in on top. Give these three a thorough mix until you have a uniform grey colour with no streaks of sand or cement showing. This dry mixing step is crucial because it ensures the cement is evenly distributed before water enters the equation.
- Hand Mixing Tip: When using a wheelbarrow, make a small well or crater in the centre of your dry mix. This helps contain the initial splash of water.
- Mixer Tip: With a mixer running, let the dry ingredients tumble for a minute or two. You'll see them blend into a consistent colour.
Once you’re happy with the dry mix, you can start adding water—a little at a time. It’s always easier to add more water than it is to take it out. Keep mixing continuously for at least three to five minutes, making sure to scrape the sides and bottom of the wheelbarrow or mixer to catch any dry pockets hiding away. The mix is ready when it hits that perfect, workable slump and has a consistent colour and texture all the way through.
Pouring and Curing for a Professional Finish
Nailing the mix ratio is a great start, but it's only half the battle. The real magic happens during the pouring and curing stages—this is where you lock in all that hard work, turning a wet mix into a tough, long-lasting surface that can take a beating.
Getting that professional finish comes down to paying close attention to detail when you pour and cure. These steps are non-negotiable for any concrete job, whether it's a small patch repair or a major project like concrete slab construction. If you rush these final stages, you’re setting yourself up for a weak, cracked mess down the line.
Once your concrete is mixed, you want to get it into the formwork as quickly as you can. Pour it in manageable sections and use a shovel or a spare bit of timber to give it a good poke and prod, especially right into the corners. This simple step gets rid of trapped air pockets and helps the mix settle properly, so you don't end up with hidden voids.
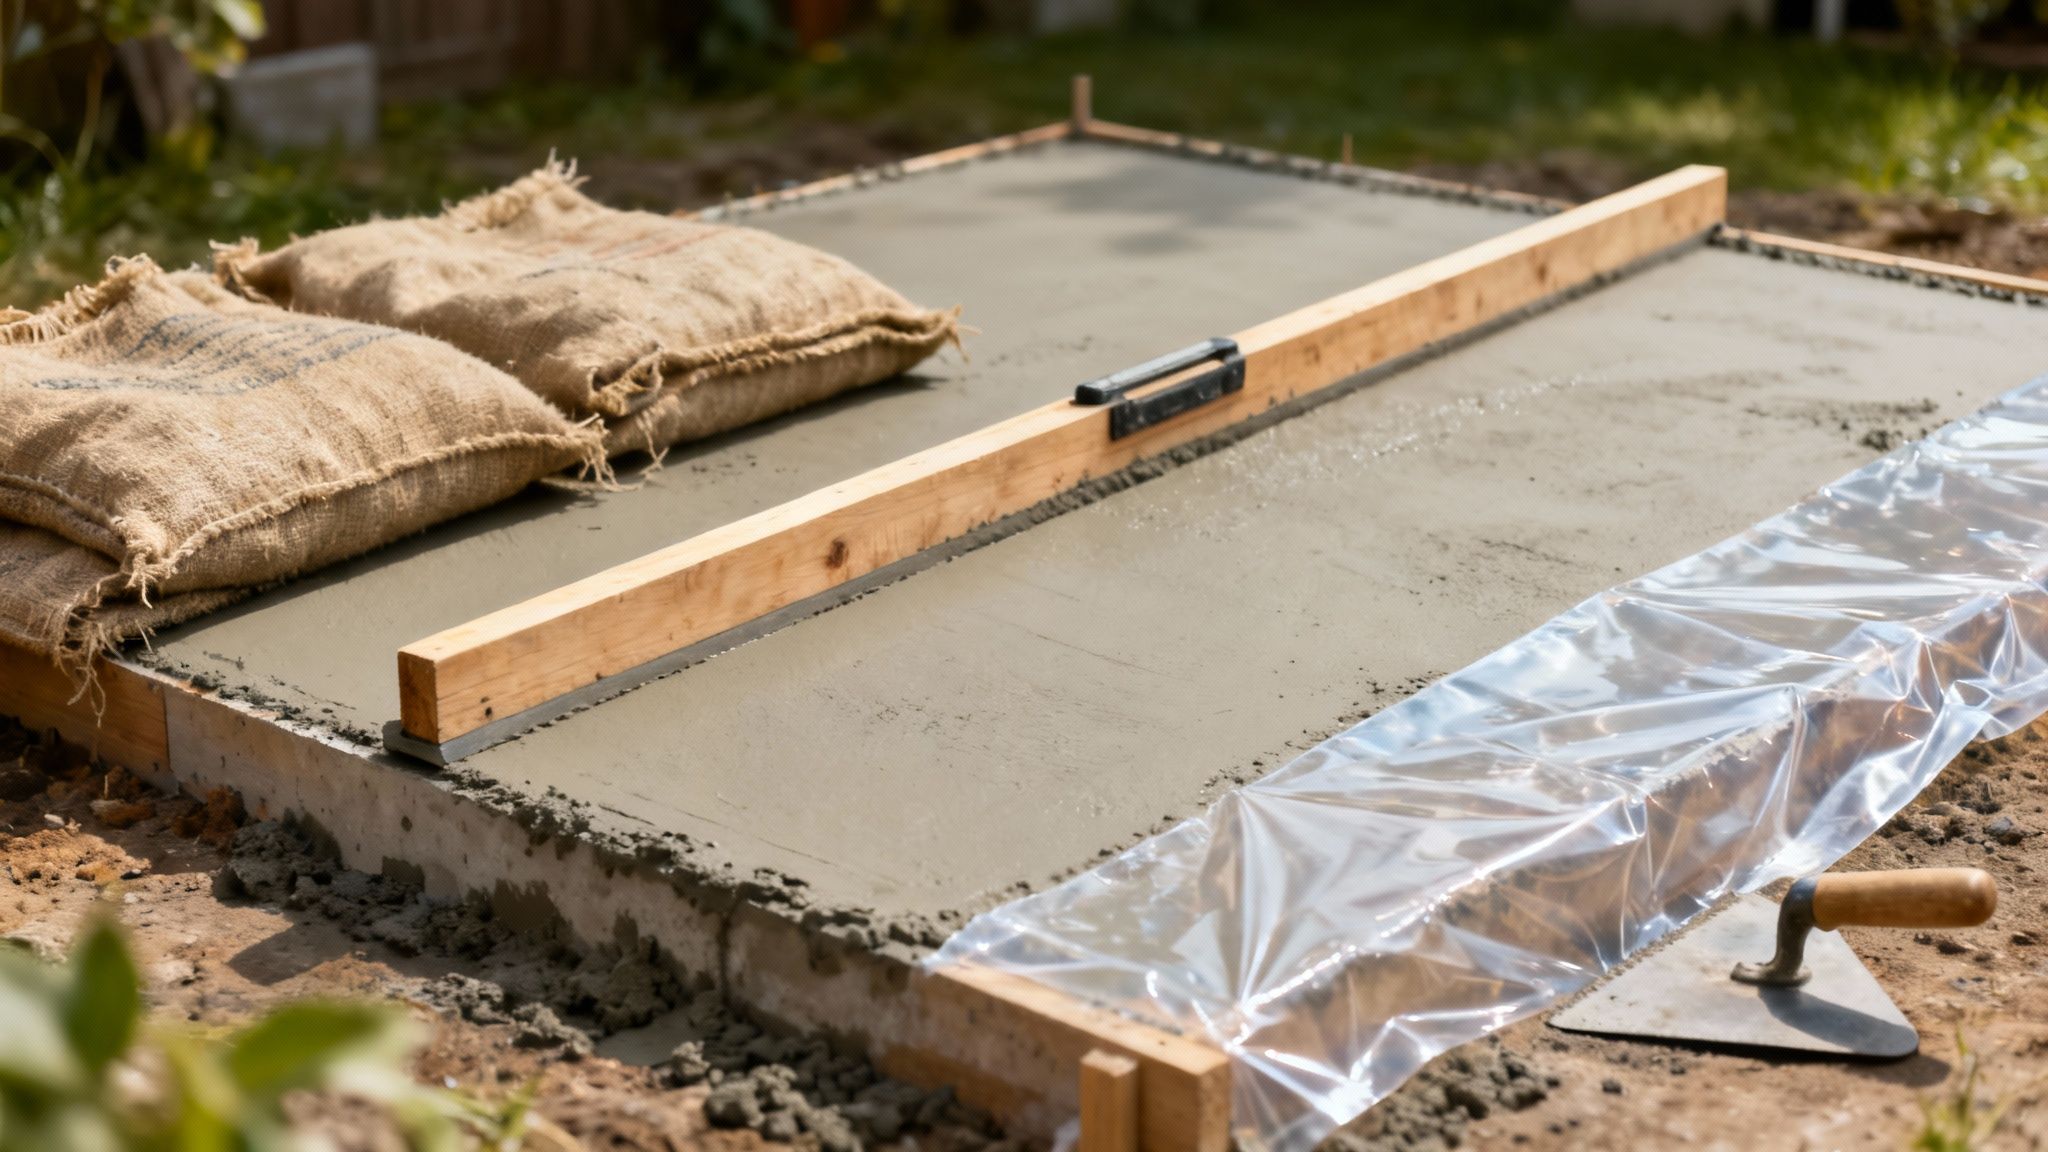
Finishing for a Flawless Surface
With the concrete in place and roughly levelled, it’s time to work on the final surface. First up is screeding. Just grab a long, straight piece of timber and drag it across the top of your formwork with a back-and-forth sawing motion. This shaves off the excess concrete and gives you a nice, flat starting point.
After you've screeded, you've got a couple of common options for the final look:
- Broom Finish: This is a fantastic, practical choice for paths or driveways where you need a bit of grip underfoot. Wait for the initial bleed water on the surface to disappear, then gently drag a stiff broom across it. It's that easy.
- Trowel Finish: If you're after a smooth, dense surface for a patio or workshop floor, a steel trowel is your tool. Let the concrete stiffen up a bit first, then use the trowel in wide, sweeping arcs to iron out any little imperfections.
Curing isn't just about letting concrete dry. It's a chemical process called hydration, where water and cement react to create the bonds that give concrete its strength. If it dries too fast, the process stops dead, and your slab will never be as strong as it could be.
The Science of Curing
Curing is easily the most critical—and most often overlooked—part of the whole process. Fresh concrete needs to stay damp for several days so the cement can fully hydrate. This is especially true here in New Zealand, where a windy day or a bit of afternoon sun can suck the moisture right out of your slab way too quickly.
Getting the curing right can make your concrete up to 50% stronger than if you just left it to dry out in the open air. The good news is, the methods are simple and cheap:
- Plastic Sheeting: Just cover the whole slab with a sheet of black plastic. Use bricks or bits of timber to weigh down the edges and trap the moisture inside, creating a humid microclimate that’s perfect for curing.
- Hessian Sacks: Another great option is to lay wet hessian sacks or even old blankets over the surface. The trick here is that you'll need to give them a light spray with the hose every now and then to keep them damp for at least a week.
Knowing how to properly finish and cure concrete is a core skill for all sorts of practical jobs, from laying foundations to general farm upkeep. If you're keen to build on this kind of hands-on knowledge, have a look at our courses on agriculture and farming for more real-world applications.
Common Concrete Mistakes (And How to Sidestep Them)
Even if you’ve nailed the perfect concrete mix ratio, a few simple slip-ups on the day can turn a solid plan into a cracked, crumbling mess. We've all seen those DIY jobs that end up dusty, uneven, or full of cracks. The good news is that most of these disasters are totally avoidable.
Let's get the big one out of the way first. The number one mistake, without a doubt, is adding too much water. It’s an easy trap to fall into – a wetter mix flows beautifully and is a dream to spread. But that convenience comes at a serious cost. Every extra drop of water weakens the final product, making it more porous and prone to cracking, especially when it cops a frosty New Zealand winter.
Dodgy Measurements and Rushed Prep Work
Another classic blunder is playing fast and loose with your measurements. Sure, using a "shovelful" as your unit is fine, but only if every shovelful is more or less the same size. If you're throwing in wildly different amounts of sand or aggregate from one batch to the next, you're creating built-in weak spots and guaranteeing an uneven finish. Consistency is king, whether you're using a shovel or a bucket.
Your concrete is only ever as strong as its weakest batch. Inconsistent ratios are like building a chain with a few flimsy links – it just compromises the whole thing.
Rushing the prep work is another surefire way to end up with a poor result. Far too many people pour concrete straight onto poorly compacted or uneven ground. Remember, the sub-base is the foundation for your slab. If it’s not firm, flat, and solid, the concrete is almost guaranteed to crack as the ground underneath inevitably settles.
- The Fix: Always, always take the time to prep your sub-base properly. For a garden path or a small pad, this means digging out any soft topsoil, laying down a good layer of GAP (General All-Paved) metal, and compacting it down with a tamper until it's rock solid.
Overworking the Surface
It’s so tempting to keep fiddling with the surface, trowelling it again and again until it’s perfectly smooth. Don't do it. Overworking concrete actually does more harm than good. It forces too much water and fine sand to the surface, creating a weak, dusty layer called laitance. This layer has terrible durability and will flake away over time, completely ruining your finish.
The real trick is to screed the concrete level, give it one pass with a float, and then walk away. Let it sit until the "bleed water" (the watery sheen on top) has completely evaporated. Only then should you come back to do your final trowel or apply a broom finish for grip. Avoid these common mistakes, and that carefully measured mix of yours will stand the best possible chance of curing into a strong, durable surface that will last for decades.
Common Questions About Mixing Concrete
Even the best-laid plans can hit a snag, and a few questions are bound to pop up when you're working with concrete. Let's tackle some of the most common queries I hear, giving you clear, practical answers so you can finish the job with confidence.
One thing people often ask about is adjusting the mix for different types of aggregate. Say your local supplier's stone is a bit larger or smaller than the standard 10-20mm chip you planned for. You might need to tweak your sand content slightly. The whole point is to have just enough sand to perfectly fill the gaps between the stones, which is what gives you a dense, super-strong mix.
Another big one is the weather. Trying to mix and pour concrete on a classic hot, windy Kiwi day can be a real challenge because the water will evaporate in a flash. To get around this, give your sub-base and any formwork a good dampen down before you pour. If you can, try to get the job done in the cooler parts of the day, like early morning or late afternoon.
Can I Add Things to My Concrete Mix?
You absolutely can, but you really need to know what you’re doing. You can buy special additives, called admixtures, which are designed to change how your concrete behaves. For example, a water-reducing admixture lets you create a more workable, flowable mix without adding extra water and weakening it. On the other hand, an accelerator can help it cure faster, which is a lifesaver in cold weather.
My advice? Stick to the proper commercial products and follow the manufacturer's instructions to the letter. Don't fall for old myths like chucking in a bit of dish soap as a cheap air-entrainer – you'll seriously compromise the strength of your final product.
Always remember the golden rule: anything you add to the mix can affect its final strength. If you have any doubt, just stick to the basic recipe of cement, sand, aggregate, and clean water.
What About Greener Concrete Options?
There's a huge push for sustainability in New Zealand's construction industry right now, and for good reason. A lot of research is going into creating more environmentally friendly concrete, mainly by cutting down the amount of Portland cement, which has a pretty hefty carbon footprint.
This focus has put a spotlight on what are called supplementary cementitious materials (SCMs). In fact, recent Kiwi research showed that replacing 30% of the Portland cement with local SCMs, like calcined clay, could maintain the concrete's strength while slashing carbon emissions. The tests even found that using finer SCMs boosted durability, which is a massive plus for projects in our seismic zones or on coastal farms. You can read more about these findings and the future of concrete production in NZ.
How Much Concrete Do I Actually Need?
Getting your quantities right is probably one of the most critical steps before you start. First up, you need to calculate the volume of your project in cubic metres. Just multiply the length by the width by the depth (in metres).
For a small slab measuring 2 metres by 2 metres and 100mm (0.1m) deep, your total volume is 0.4 cubic metres.
Once you have that volume, you can use an online calculator or follow this general rule of thumb for a standard 1:2:4 mix:
- Cement: You’ll need roughly 6-7 bags (20kg) for every cubic metre.
- Sand: About 0.5 cubic metres.
- Aggregate: About 1.0 cubic metre.
Here’s a pro tip: always buy about 10% more material than your calculations say you need. It is so much better to have a little bit left over than to run out halfway through a pour. Trust me on that one.
At Prac Skills NZ, we believe in providing Kiwis with the practical knowledge to succeed. Our online courses are designed to help you build real-world skills for your business, side hustle, or personal passion projects. Discover a course that’s right for you.
